Category: West Texas Favorites

Recipes and food stories inspired by West Texas and the Chihuahuan Desert.

  • Cast-Iron New York Strip Sandwiches with Caramelized Onions

    Cast-Iron New York Strip Sandwiches with Caramelized Onions

    There are sandwiches, and then there are steak sandwiches that require a stack of napkins and a serious appetite. This is the second kind.

    A thick New York strip hits a blazing-hot cast-iron skillet, builds a dark crust, rests just long enough to stay juicy, then gets sliced across the grain and piled onto buttery toasted bread. Add a heap of slow-caramelized onions and a spoonful of beefy skillet drippings, and you have the kind of sandwich that can turn a regular weeknight into something worth talking about.

    Out here in West Texas, we don’t need a lot of fancy ingredients when the main ingredient is a good piece of beef. Give me a well-seasoned strip steak, an onion, a hot skillet, and sturdy bread that can hold its own—and I’m in business.

    Why New York Strip Works
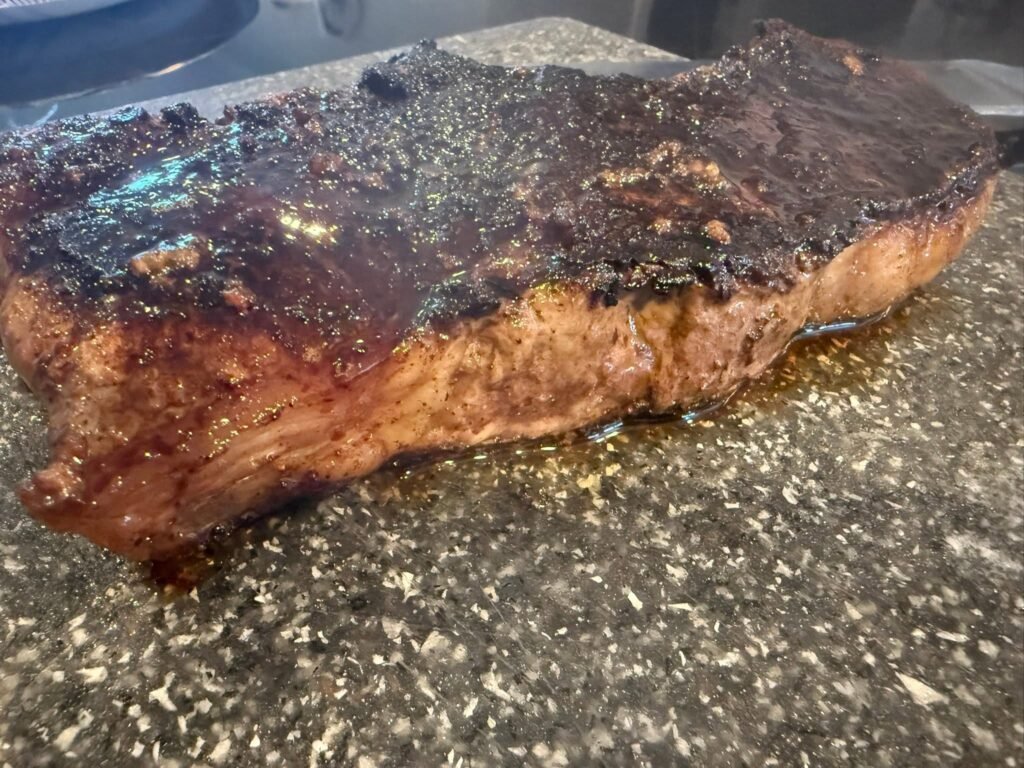
    Thick New York strip steak seared in a cast-iron skillet with a dark crust
    A thick-cut New York strip steak with a deep cast-iron crust, ready to rest before slicing for steak sandwiches.

    New York strip has a bold, beef-forward flavor, a satisfying chew, and just enough fat around the edge to make every bite rich. It is a little firmer than ribeye, which makes one step especially important: slice it thinly across the grain after it has rested.

    That means you get tender steak in every bite instead of long, chewy strips that pull the whole sandwich apart when you take a bite.

    The onions do their part too. Cooked low and slow in butter, they become sweet, soft, and deeply browned. A quick splash of Worcestershire adds a little savory backbone and helps turn those skillet bits into the kind of juice you’ll want running down the side of your sandwich.

    Cast-Iron New York Strip Sandwiches

    Serves: 2 hungry people
    Prep time: 10 minutes
    Cook time: 35 to 45 minutes
    Total time: About 45 minutes

    Ingredients

    • 1 thick-cut New York strip steak, about 1 to 1½ pounds
    • Kosher salt, to taste
    • Coarse black pepper, to taste
    • ½ teaspoon garlic powder
    • ½ teaspoon smoked paprika
    • 1 large yellow or sweet onion, thinly sliced
    • 1 tablespoon butter
    • 1 tablespoon high-heat cooking oil
    • 1 teaspoon Worcestershire sauce
    • 2 sturdy sandwich rolls, hoagie rolls, or ciabatta rolls
    • Extra butter for toasting the bread
    • 2 slices provolone, pepper jack, or Swiss cheese, optional
    • ¼ cup beef broth, water, or beer, optional
    • Horseradish mayo or Dijon mustard, optional

    Build the Onions First

    Heat the butter and oil in a cast-iron skillet over medium to medium-low heat. Add the sliced onions and a small pinch of salt.

    Cook the onions slowly, stirring every few minutes, until they soften and turn deep golden brown. This usually takes 25 to 35 minutes. Don’t rush them. If they begin to brown too quickly, lower the heat. You want sweet, jammy onions—not scorched ones.

    During the last few minutes, stir in the Worcestershire sauce. Remove the onions from the skillet and set them aside.

    Sear That Strip Steak

    Pat the New York strip dry with paper towels. Season both sides generously with kosher salt, black pepper, garlic powder, and smoked paprika.

    Turn the skillet up to medium-high or high heat. Once it is hot enough to make you think twice about leaning over it, add a small amount of oil if the pan looks dry.

    Lay in the steak and leave it alone long enough to develop a serious crust. For a steak about 1 to 1½ inches thick, cook it around 3 to 5 minutes per side for medium-rare, adjusting for thickness and your preferred doneness.

    Don’t forget the fat edge. Use tongs to stand the steak on its side for a minute or two so that fat cap renders and browns. That little step adds a lot of flavor.

    Move the steak to a cutting board and let it rest for 8 to 10 minutes.

    Make the Skillet Juice

    While the steak rests, add a splash of beef broth, water, or beer to the skillet. Scrape up every browned bit from the bottom of the pan.

    Those dark bits are flavor, not a cleanup problem.

    Let the liquid simmer briefly, then add any juices that collected under the resting steak. You are not making a full gravy—just a quick, beefy drizzle to keep the sandwich moist and bring everything together.

    Toast and Stack

    Butter the cut sides of the sandwich rolls and toast them in a skillet until crisp and golden. If you are using cheese, add it to the bottom half while the bread is still hot so it melts.
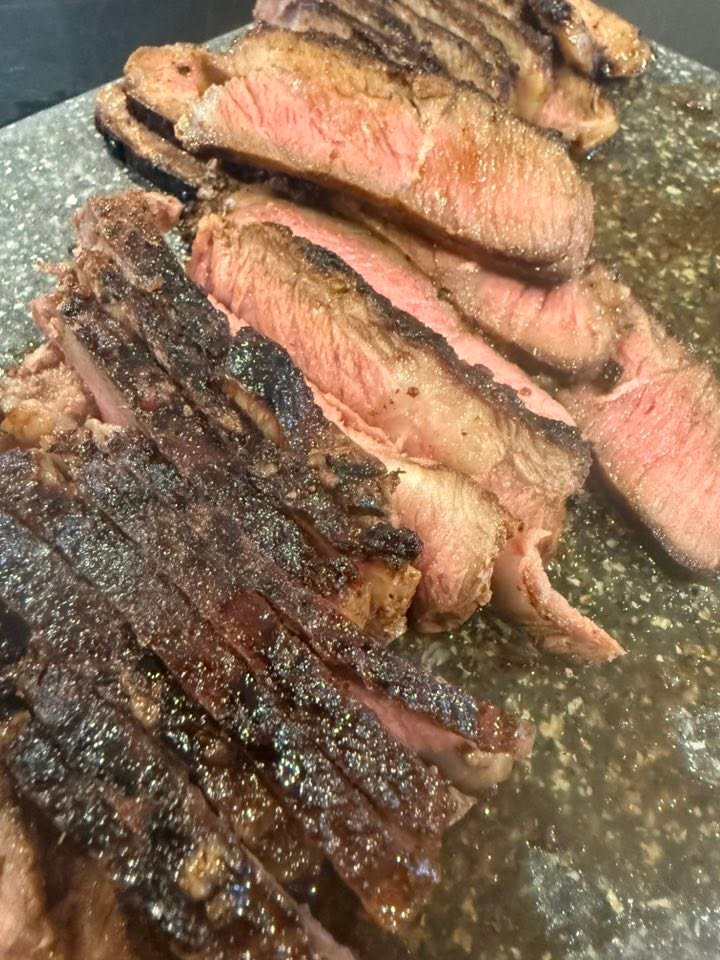
    Medium-rare New York strip steak sliced across the grain after cast-iron searing
    Cast-iron-seared New York strip, rested and sliced across the grain for tender steak sandwiches.

    Slice the rested steak thinly across the grain. Pile it high on the rolls, including some of those browned, rendered pieces from the fat edge. Top with a generous mound of caramelized onions.

    Spoon a little skillet juice over the meat, add horseradish mayo or Dijon if that sounds good, and put the top bun in place.

    Then take a bite before the sandwich has a chance to fall apart.

    A Few West Texas Grub Notes

    • Use bread with some backbone. Soft white sandwich bread will surrender immediately under the steak juices.
    • A thick steak is worth it here. It is easier to build a good crust while keeping the center pink and juicy.
    • For an extra-rich version, add mushrooms to the onions during the last 10 minutes of cooking.
    • Pepper jack gives the sandwich a little kick, while provolone keeps it classic and lets the beef take center stage.
    • Serve with potato chips, fries, pickles, or a cold beer—and keep the napkins close.

    This isn’t trying to be a delicate bistro sandwich. It is a hot, juicy, onion-loaded New York strip sandwich built around a skillet, good beef, and the conviction that dinner ought to leave you full and happy.
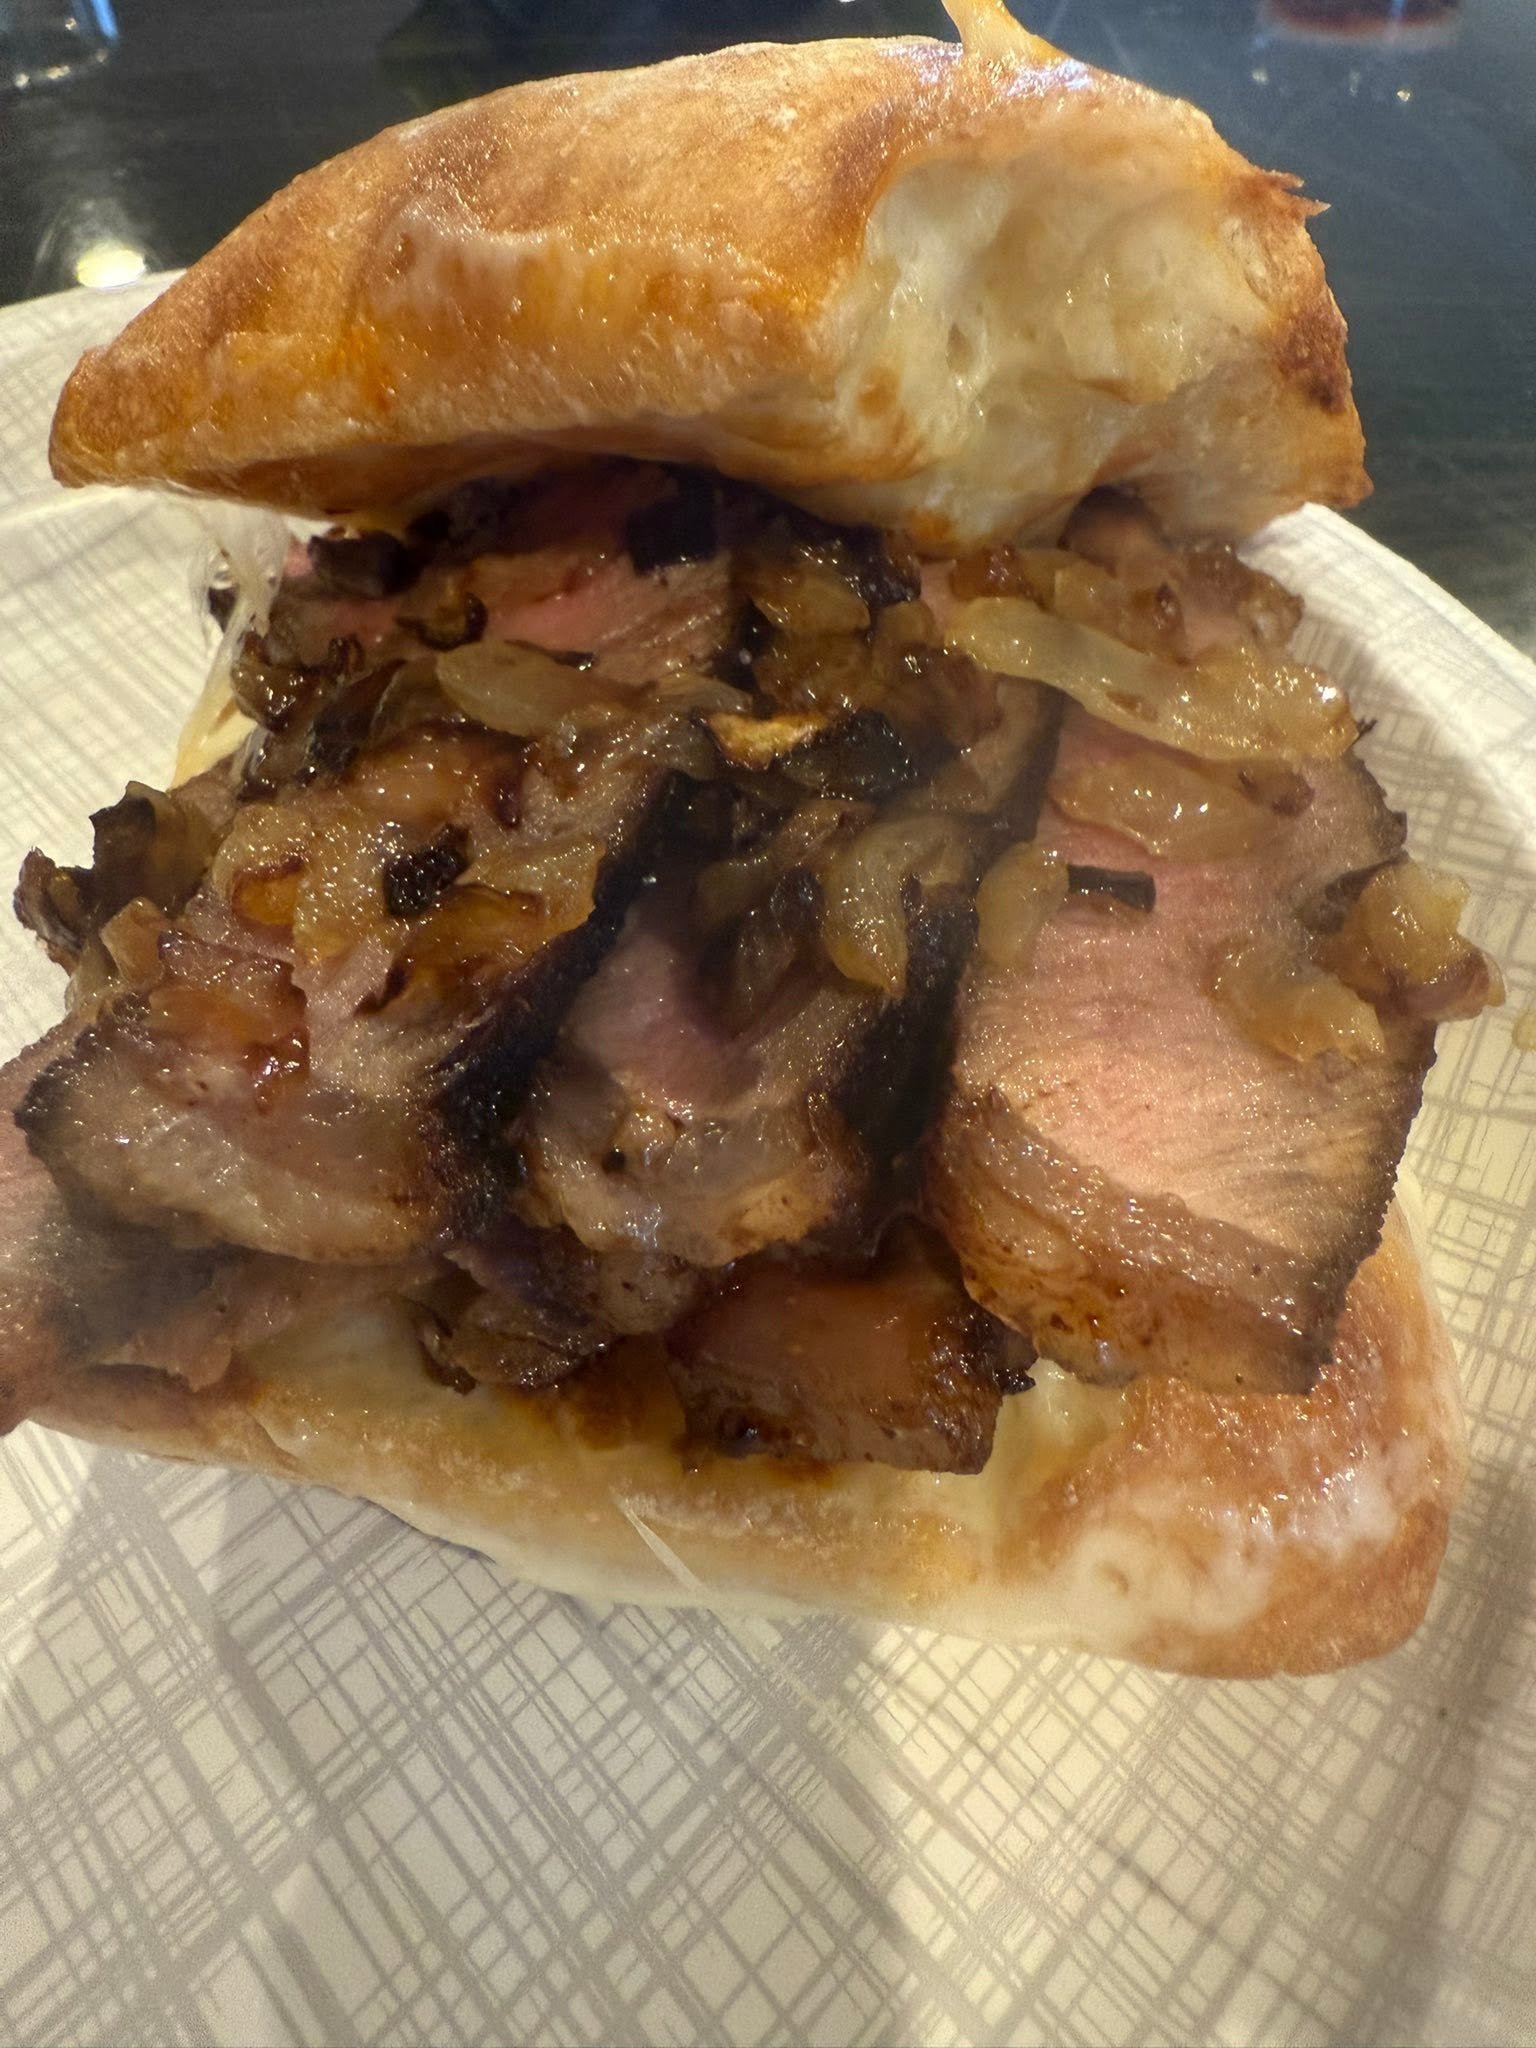
    New York strip steak sandwich with caramelized onions on toasted bread

    Cast-Iron New York Strip Sandwiches

    Prep Time 10 minutes
    Cook Time 35 minutes
    Total Time 45 minutes
    Servings: 2
    Course: Main Course

    Ingredients
      

    Ingredients
    • 1 thick-cut New York strip steak about 1 to 1½ pounds
    • Kosher salt to taste
    • Coarse black pepper to taste
    • ½ teaspoon garlic powder
    • ½ teaspoon smoked paprika
    • 1 large yellow or sweet onion thinly sliced
    • 1 tablespoon butter
    • 1 tablespoon high-heat cooking oil
    • 1 teaspoon Worcestershire sauce
    • 2 sturdy sandwich rolls hoagie rolls, or ciabatta rolls
    • Extra butter for toasting the bread
    • 2 slices provolone pepper jack, or Swiss cheese, optional
    • ¼ cup beef broth water, or beer, optional
    • Horseradish mayo or Dijon mustard optional

    Method
     

    Build the Onions First
    1. Heat the butter and oil in a cast-iron skillet over medium to medium-low heat. Add the sliced onions and a small pinch of salt.
    2. Cook the onions slowly, stirring every few minutes, until they soften and turn deep golden brown. This usually takes 25 to 35 minutes. Don’t rush them. If they begin to brown too quickly, lower the heat. You want sweet, jammy onions—not scorched ones.
    3. During the last few minutes, stir in the Worcestershire sauce. Remove the onions from the skillet and set them aside.
    Sear That Strip Steak
    1. Pat the New York strip dry with paper towels. Season both sides generously with kosher salt, black pepper, garlic powder, and smoked paprika.
    2. Turn the skillet up to medium-high or high heat. Once it is hot enough to make you think twice about leaning over it, add a small amount of oil if the pan looks dry.
    3. Lay in the steak and leave it alone long enough to develop a serious crust. For a steak about 1 to 1½ inches thick, cook it around 3 to 5 minutes per side for medium-rare, adjusting for thickness and your preferred doneness.
    4. Don’t forget the fat edge. Use tongs to stand the steak on its side for a minute or two so that fat cap renders and browns. That little step adds a lot of flavor.
    5. Move the steak to a cutting board and let it rest for 8 to 10 minutes.
    Make the Skillet Juice
    1. While the steak rests, add a splash of beef broth, water, or beer to the skillet. Scrape up every browned bit from the bottom of the pan.
    2. Those dark bits are flavor, not a cleanup problem.
    3. Let the liquid simmer briefly, then add any juices that collected under the resting steak. You are not making a full gravy—just a quick, beefy drizzle to keep the sandwich moist and bring everything together.
    Toast and Stack
    1. Butter the cut sides of the sandwich rolls and toast them in a skillet until crisp and golden. If you are using cheese, add it to the bottom half while the bread is still hot so it melts.
    2. Slice the rested steak thinly across the grain. Pile it high on the rolls, including some of those browned, rendered pieces from the fat edge. Top with a generous mound of caramelized onions.
    3. Spoon a little skillet juice over the meat, add horseradish mayo or Dijon if that sounds good, and put the top bun in place.
    4. Then take a bite before the sandwich has a chance to fall apart.

    Notes

    A Few West Texas Grub Notes
    Use bread with some backbone. Soft white sandwich bread will surrender immediately under the steak juices.
    A thick steak is worth it here. It is easier to build a good crust while keeping the center pink and juicy.
    For an extra-rich version, add mushrooms to the onions during the last 10 minutes of cooking.
    Pepper jack gives the sandwich a little kick, while provolone keeps it classic and lets the beef take center stage.
    Serve with potato chips, fries, pickles, or a cold beer—and keep the napkins close.
    This isn’t trying to be a delicate bistro sandwich. It is a hot, juicy, onion-loaded New York strip sandwich built around a skillet, good beef, and the conviction that dinner ought to leave you full and happy.
  • Cole’s Fried Chicken | Crispy Buttermilk Chicken Breast Recipe

    Cole’s Fried Chicken | Crispy Buttermilk Chicken Breast Recipe

    There is nothing quite like a piece of hot, crispy fried chicken breast fresh from the skillet. Cole’s Fried Chicken starts with a seasoned buttermilk soak, then builds that beautiful rough-and-crunchy crust with a wet batter and a seasoned flour dredge.

    Serves: 4
    Marinating time: At least 1 hour; overnight recommended
    Frying temperature: 340–350°F

    Ingredients

    Buttermilk Marinade

    • 4 chicken breasts
    • 2 cups buttermilk
    • 2 teaspoons kosher salt
    • 2 teaspoons garlic powder
    • 1 teaspoon hot chili powder, such as serrano or cayenne

    Flour-Based Wet Batter

    • 1 cup all-purpose flour
    • 1 cup buttermilk, fresh or ladled from the marinade
    • 1 large egg
    • 1 teaspoon kosher salt
    • 1 teaspoon garlic powder
    • ½ teaspoon smoked paprika
    • ¼ teaspoon black pepper

    Final Dredge

    • 2 cups all-purpose flour
    • ½ cup cornstarch
    • 2½ teaspoons kosher salt
    • 1½ teaspoons smoked paprika
    • 2 teaspoons garlic powder
    • 1 teaspoon oyster mushroom powder, optional
    • ½ teaspoon freshly ground black pepper
    • 1 teaspoon cayenne pepper, optional, for extra heat
    • 1½ to 2 teaspoons baking powder
    • 2 to 3 tablespoons buttermilk, for creating crunchy flour clumps

    For Frying

    • Neutral frying oil, such as peanut or canola oil

    Instructions

    1. Marinate the chicken

    In a large bowl, whisk together the buttermilk, kosher salt, garlic powder, and hot chili powder. Add the chicken breasts and make sure they are fully coated.

    Cover and refrigerate for at least 1 hour. For the best flavor, marinate overnight.

    2. Make the wet batter

    In a medium bowl, whisk together the flour, kosher salt, garlic powder, smoked paprika, and black pepper.

    In a separate bowl, whisk the egg and buttermilk until smooth. Pour the wet mixture into the flour mixture and whisk until it becomes a smooth, pancake-like batter. It should cling to the chicken but still drip slowly from a spoon.

    If the batter is too thick, add a small splash of buttermilk or water. If it is too thin, whisk in a little more flour.

    3. Prepare the final dredge

    In a large shallow bowl or baking dish, whisk together the flour, cornstarch, kosher salt, smoked paprika, garlic powder, optional oyster mushroom powder, black pepper, optional cayenne, and baking powder.

    Just before coating the chicken, drizzle 2 to 3 tablespoons of buttermilk into the flour mixture. Toss it together with your fingers to create small flour clumps. Those clumps become the extra-craggy, crispy bits on the finished chicken.

    4. Prepare the chicken

    Remove the chicken breasts from the marinade. Pat them lightly with paper towels so they are no longer dripping but still moist.

    If the breasts are especially thick, butterfly and flatten them or gently pound them to an even thickness. This helps the chicken cook evenly.

    5. Batter and dredge

    Dip one chicken breast into the wet batter, coating it completely. Let the excess batter drip away for a couple of seconds.

    Transfer the chicken to the final dredge. Toss and press the seasoned flour firmly onto every side, making sure the flour clumps adhere well. Shake away only the loose excess—keep as much of the craggy coating as possible.

    Place the coated chicken on a wire rack. Repeat with the remaining chicken breasts.

    6. Rest the coating

    Let the coated chicken rest on the wire rack for 10 to 20 minutes. This gives the coating time to hydrate and set, helping it stay attached during frying.

    7. Fry the chicken

    Pour enough neutral oil into a heavy skillet, Dutch oven, or fryer for frying. Heat the oil to 340–350°F.

    Fry the chicken 1 to 2 pieces at a time, depending on the size of your pan. Do not crowd the oil.

    Cook until the crust is deep golden brown and the thickest part of the chicken reaches 165°F. Medium-size chicken breasts will usually take about 6 to 10 minutes, depending on their thickness and how steadily the oil holds its temperature.

    Transfer the fried chicken to a clean wire rack to drain. Avoid paper towels, which can trap steam and soften the crust.

    8. Rest and serve

    Let the chicken rest for 5 to 10 minutes before slicing or building sandwiches. This keeps the crust intact and gives the juices time to settle back into the meat.

    Notes

    • For extra heat: Use the optional cayenne in the dredge and choose a hotter chili powder for the marinade.
    • For the crispiest crust: Do not skip the wire-rack rest before frying or after frying.
    • For sandwiches: Serve on toasted buns with pickles, mayo, slaw, or your favorite hot sauce.
    • Optional umami boost: Oyster mushroom powder adds a subtle savory depth, but the recipe works great without it.
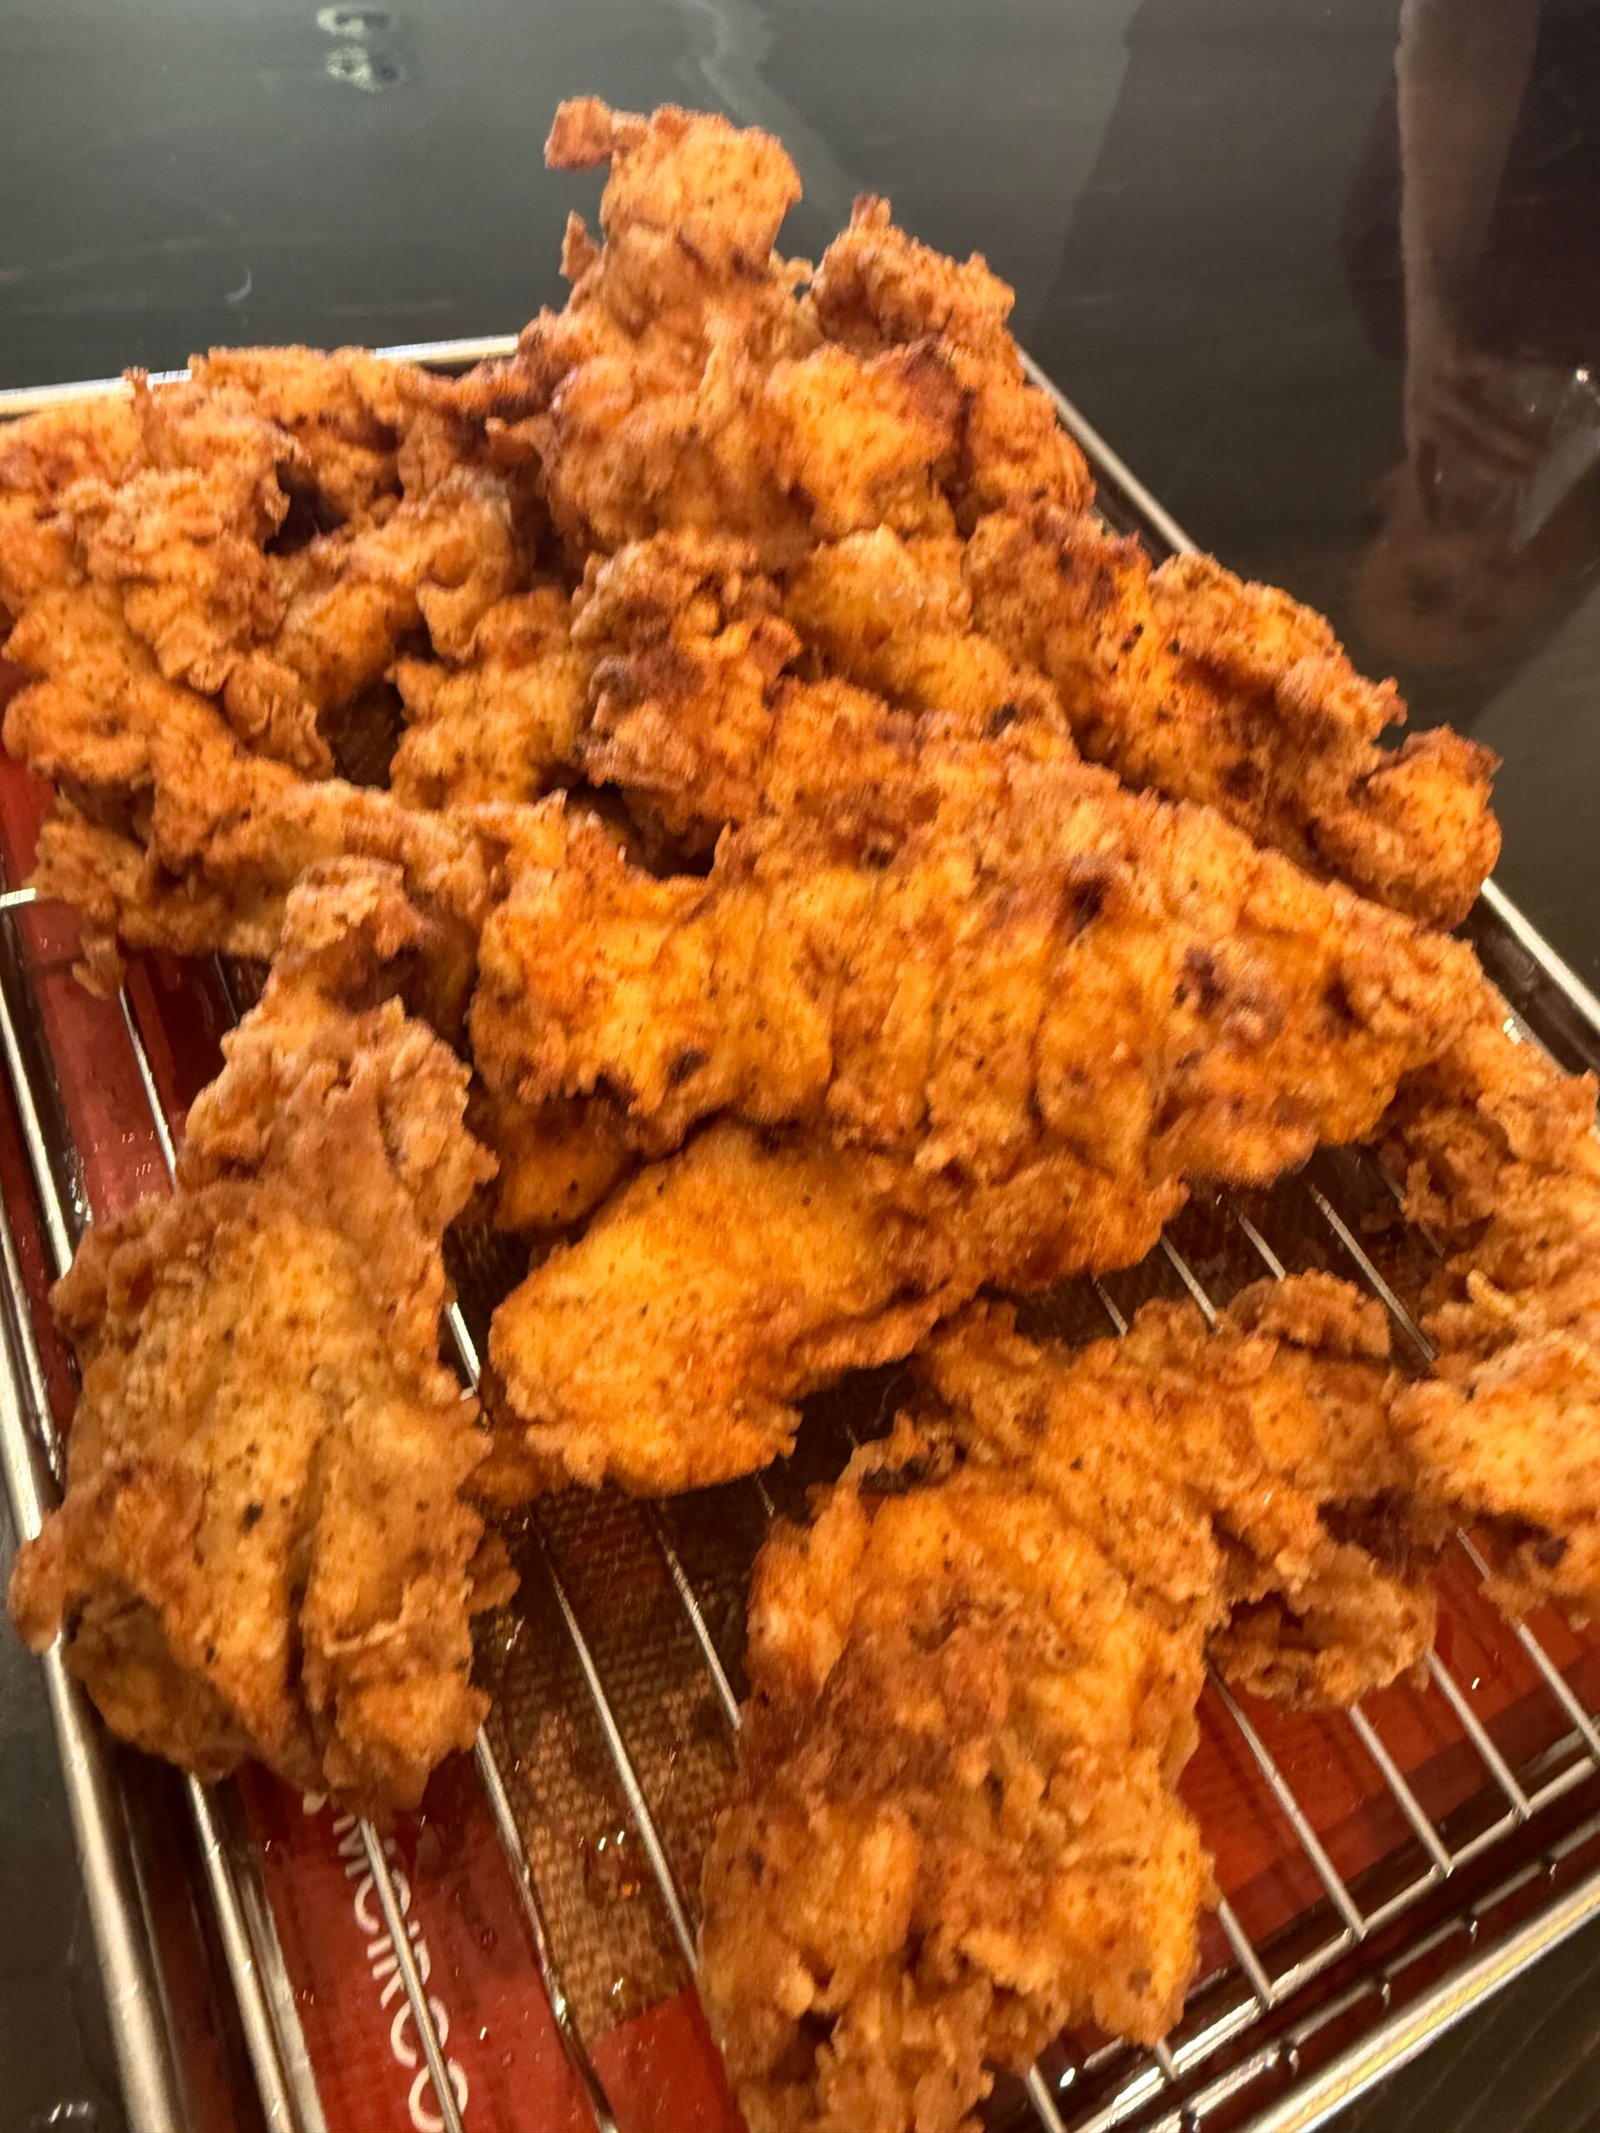
    Crispy golden-brown buttermilk fried chicken breasts with a craggy seasoned crust
    Cole

    Cole’s Fried Chicken

    Crispy, golden-brown buttermilk fried chicken breasts with a craggy seasoned crust.
    Servings: 4

    Ingredients
      

    Buttermilk Marinade
    • 4 chicken breasts
    • 2 cups buttermilk
    • 2 teaspoons kosher salt
    • 2 teaspoons garlic powder
    • 1 teaspoon hot chili powder such as serrano or cayenne
    Flour-Based Wet Batter
    • 1 cup all-purpose flour
    • 1 cup buttermilk fresh or ladled from the marinade
    • 1 large egg
    • 1 teaspoon kosher salt
    • 1 teaspoon garlic powder
    • 1/2 teaspoon smoked paprika
    • 1/4 teaspoon black pepper
    Final Dredge
    • 2 cups all-purpose flour
    • 1/2 cup cornstarch
    • 2 1/2 teaspoons kosher salt
    • 1 1/2 teaspoons smoked paprika
    • 2 teaspoons garlic powder
    • 1 teaspoon oyster mushroom powder optional
    • 1/2 teaspoon freshly ground black pepper
    • 1 teaspoon cayenne pepper optional
    • 1 1/2 to 2 teaspoons baking powder
    • 2 to 3 tablespoons buttermilk from the marinade or fresh

    Method
     

    Buttermilk Marinade
    1. Whisk together the buttermilk, kosher salt, garlic powder, and hot chili powder in a large bowl.
    2. Add the chicken breasts and coat completely.
    3. Cover and refrigerate for at least 1 hour. Overnight is best for deeper flavor.
    Make the Wet Batter
    1. Whisk together the flour, kosher salt, garlic powder, smoked paprika, and black pepper in a medium bowl.
    2. In a separate bowl, whisk the egg and buttermilk until smooth.
    3. Pour the egg-and-buttermilk mixture into the dry ingredients.
    4. Whisk until smooth and pancake-like. The batter should cling to the chicken but still drip slowly.
    5. If the batter is too thick, add a splash of buttermilk or water.
    6. If it is too thin, whisk in a little more flour.
    Prepare the Final Dredge
    1. Whisk together the flour, cornstarch, kosher salt, smoked paprika, garlic powder, optional oyster mushroom powder, black pepper, optional cayenne, and baking powder in a large shallow bowl.
    2. Just before coating the chicken, drizzle 2 to 3 tablespoons of buttermilk into the dredge.
    3. Toss with your fingers to form small flour clumps for a craggier crust.
    Coat and Fry the Chicken
    1. Remove chicken from the marinade and pat lightly with paper towels. The chicken should still be moist but not dripping.
    2. Butterfly and flatten thick chicken breasts, or gently pound them to an even thickness.
    3. Dip each chicken breast fully into the wet batter.
    4. Let the excess batter drip away for a couple of seconds.
    5. Transfer the chicken to the final dredge.
    6. Toss and press the flour mixture firmly onto all sides, making sure the flour clumps stick.
    7. Shake away only loose excess flour.
    8. Transfer coated chicken to a wire rack.
    9. Rest the chicken for 10 to 20 minutes so the coating can hydrate and set.
    10. Heat neutral oil to 340 to 350°F.
    11. Fry 1 to 2 pieces at a time without crowding the pan.
    12. Fry until deep golden brown and the thickest part reaches 165°F, about 6 to 10 minutes depending on thickness and oil temperature.
    13. Drain on a clean wire rack rather than paper towels.
    14. Rest fried chicken for 5 to 10 minutes before slicing or serving.
    Notes
    1. For extra heat, use the optional cayenne in the final dredge and a hotter chili powder in the marinade.
    2. Do not skip the wire-rack rest before frying or after frying; it helps preserve the crunchy coating.
    3. Oyster mushroom powder adds savory depth but is optional.
    4. Serve as a fried chicken dinner or use the breasts for sandwiches with toasted buns, pickles, slaw, mayonnaise, or hot sauce.
  • Welcome to West Texas Grub: Good Food from the Chihuahuan Desert

    Welcome to West Texas Grub: Good Food from the Chihuahuan Desert

    Welcome to West Texas Grub. We are Cole and Donna, a retired couple cooking in rural West Texas, where a grocery trip takes planning and fresh ingredients need to last.

    Living in the Chihuahuan Desert has taught us that good meals begin long before we turn on the stove. They begin with a thoughtful grocery list, a well-stocked pantry, dependable freezer space, and the ability to make the most of what is already at home.

    We love food and cooking together. Here, we will share practical recipes, pantry and freezer ideas, grocery-trip planning, ingredient storage, useful kitchen gear, and stories from life at our desert table. Some recipes will be simple meals for two. Others will be made for company, weekends, the grill, or a hungry day when we want something hearty and familiar.

    This is a new beginning for West Texas Grub, and we are glad you found us. Pull up a chair, take a look around, and come cook with us.