Tag: West Texas cooking

  • The West Texas Desert Pantry: 20 Staples I Keep on Hand

    The West Texas Desert Pantry: 20 Staples I Keep on Hand

    In West Texas, keeping a good pantry is not about preparing for the end of the world. It is about preparing for Tuesday.

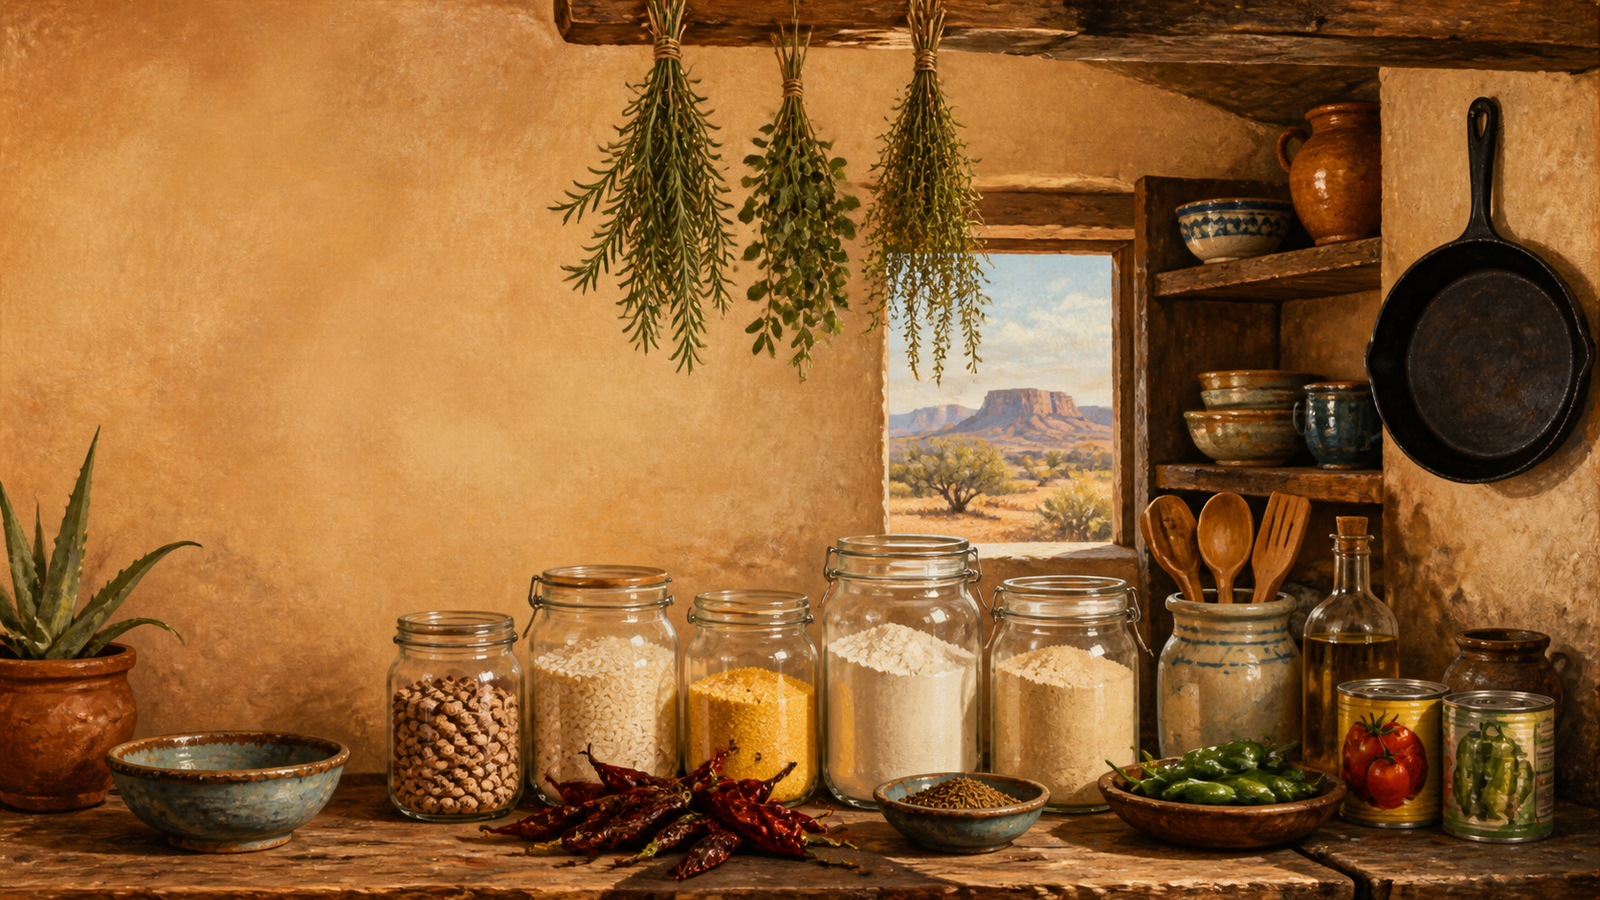
    When town is a long drive away, the wind is up, or you simply do not feel like making another grocery run, a shelf full of dependable ingredients can still make a good supper happen. My desert pantry is built around food that earns its place: pinto beans that can become a pot of beans or refried beans, cornmeal for a skillet of cornbread, canned tomatoes for chili or soup, and enough seasoning to make simple food taste like something worth sitting down for.

    These are the 20 staples I keep on hand for everyday West Texas cooking.

    A note on storage: West Texas heat can shorten the quality life of pantry foods, especially oils, flour, nuts, and canned goods. Store food indoors in a cool, dry, dark place—not in a garage, shed, or sun-baked utility room—and rotate it by using the oldest items first.

    Beans, Grains, and Meal-Makers

    1. Pinto beans

    Pinto beans are the heart of my pantry. A big pot can be supper on its own, a side dish beside cornbread, or tomorrow’s refried beans and burrito filling. They are inexpensive, filling, and always useful.

    2. Rice

    Long-grain white rice is one of the easiest ways to stretch a meal. Serve it with beans, cook it in broth, make Spanish rice, or stir leftovers into a skillet supper.

    3. All-purpose flour

    Flour earns its shelf space in a West Texas kitchen. It makes biscuits and gravy, thickens stews, coats chicken before frying, and comes to the rescue when you want a quick cobbler or dessert.

    4. Cornmeal

    A pot of beans needs cornbread. Keep cornmeal for a hot cast-iron skillet of cornbread, hush puppies, breading, or any meal that needs a simple, filling side.

    5. Masa harina

    Masa harina is worth keeping even if you do not make tortillas every week. It makes homemade corn tortillas, adds a good corn flavor to a meal, and can help thicken a pot of chile.

    6. Pasta or egg noodles

    Not every supper has to be Tex-Mex. Pasta and egg noodles are useful for tomato-based skillet meals, chicken noodle soup, casseroles, and quick meals when the refrigerator is looking thin.

    Canned and Jarred Building Blocks

    7. Canned tomatoes

    Diced, crushed, or whole canned tomatoes are a foundation for chili, soup, sauce, and one-pot suppers. I keep more than one kind because each has a different job in the kitchen.

    8. Tomato sauce and tomato paste

    Tomato sauce adds quick body to a dish, while tomato paste gives deeper flavor. Let the paste cook for a minute with onions, garlic, or spices before adding liquid, and it will taste like it has been simmering much longer than it has.

    9. Canned green chiles

    A small can of green chiles can wake up a plain meal. Stir them into beans, queso, cornbread, breakfast eggs, soups, and casseroles. Keep mild or hot depending on who is coming to supper.

    10. Canned corn

    Canned corn is an easy vegetable to keep around for chowder, cornbread dressing, skillet meals, and quick side dishes. It also works well when you need to make a little protein go farther.

    11. Chicken broth or bouillon

    Broth and bouillon make rice, beans, soups, gravies, and sauces taste like you planned ahead—even when you did not. Keep whichever kind you use most: boxed broth, canned broth, bouillon cubes, or a concentrated paste.

    12. Shelf-stable protein

    Canned tuna, canned chicken, salmon, corned beef, or another protein your household truly eats belongs in a working pantry. It is the answer for nights when nothing was thawed and dinner still needs to happen.

    Flavor Makers

    13. Dried red chiles or chile powder

    Keep the kind you use most. Whole dried chiles give you rich flavor and more control; a good chile powder makes quick weeknight cooking easier. Either one belongs in beans, chili, soups, and red chile gravy.

    14. Ground cumin

    Cumin is one of the defining flavors of my pantry. It belongs in pinto beans, chili, taco meat, soups, and roasted vegetables. A little goes a long way, so add it with purpose.

    15. Garlic powder and onion powder

    Fresh onion and garlic are hard to beat, but these two pantry staples save a meal when the produce basket is empty. They are especially useful in dry rubs, soups, beans, and quick skillet meals.

    16. Mexican oregano

    Mexican oregano has a bolder, more earthy flavor than the Italian-style oregano many people keep. It is especially good in beans, red chile, taco fillings, and Mexican-inspired soups.

    17. Salt and black pepper

    They may be basic, but they are non-negotiable. Good cooking usually starts with seasoning food at the right time, not just shaking something over it at the table.

    18. Hot sauce or pickled jalapeños

    A bottle of hot sauce or a jar of pickled jalapeños adds brightness, heat, and personality to a meal. It also lets everyone adjust their own plate without turning the whole pot too spicy.

    Baking and Comfort-Food Essentials

    19. Cooking oil and a dependable cooking fat

    Keep a neutral cooking oil for frying and baking, plus the fat you honestly use—whether that is bacon drippings, lard, butter, or shortening. Use manageable quantities and store oils away from heat and light so they stay fresh.

    20. Baking powder, baking soda, and evaporated milk

    These three make a surprising number of comfort foods possible without a last-minute store run. They cover biscuits, cornbread, pancakes, creamy soups, and old-fashioned desserts. Evaporated milk is especially handy because it stays shelf-stable until opened.

    Five Meals From a West Texas Pantry

    A working pantry should not just look good on a shelf. It should answer the question, “What are we having for supper?” Here are five simple ideas made from the staples above.

    Pinto beans, rice, and cast-iron cornbread

    Cook pinto beans with broth, chile powder, cumin, garlic, onion, salt, and pepper. Serve them over rice with a skillet of cornbread on the side.

    Quick pantry chili

    Combine canned tomatoes, tomato sauce, beans, chile powder, cumin, garlic powder, and onion powder. Add browned ground beef if you have it, or use canned chicken or another shelf-stable protein when you need an easy substitute.

    Green chile corn skillet

    Cook canned corn with green chiles, seasoning, and whatever protein you have on hand. Add eggs, cheese, or leftover rice if available, then finish with hot sauce or pickled jalapeños.

    Tomato noodle soup

    Simmer pasta or egg noodles in broth with canned tomatoes, garlic powder, Mexican oregano, salt, and black pepper. Add canned chicken or any leftover meat if you have it.

    Bean-and-cheese burritos

    Mash cooked pinto beans with a little broth, cumin, garlic, and green chiles. Spoon into tortillas with cheese, roll them up, and heat in a skillet until warm and crisp around the edges.

    Build the Pantry You Will Use

    You do not need a giant pantry or picture-perfect rows of matching jars to cook well at home. Start with foods your family already reaches for, keep them organized, and replace them as you use them.

    Over time, those dependable staples become a working pantry—the kind that can carry you from a pot of beans to a hot skillet supper without requiring a trip to town.


    West Texas Desert Pantry Starter Checklist

    Use this list as a starting point, then adjust it to match the foods your household loves.

    • Pinto beans
    • Rice
    • All-purpose flour
    • Cornmeal
    • Masa harina
    • Pasta or egg noodles
    • Canned tomatoes
    • Tomato sauce
    • Tomato paste
    • Canned green chiles
    • Canned corn
    • Chicken broth or bouillon
    • Shelf-stable protein
    • Dried red chiles or chile powder
    • Ground cumin
    • Garlic powder
    • Onion powder
    • Mexican oregano
    • Salt
    • Black pepper
    • Hot sauce or pickled jalapeños
    • Cooking oil
    • Bacon drippings, lard, butter, or shortening
    • Baking powder
    • Baking soda
    • Evaporated milk

    What is always in your pantry? Tell me in the comments—especially if it is a West Texas staple I ought to add to my shelf.
  • Cole’s Fried Chicken | Crispy Buttermilk Chicken Breast Recipe

    Cole’s Fried Chicken | Crispy Buttermilk Chicken Breast Recipe

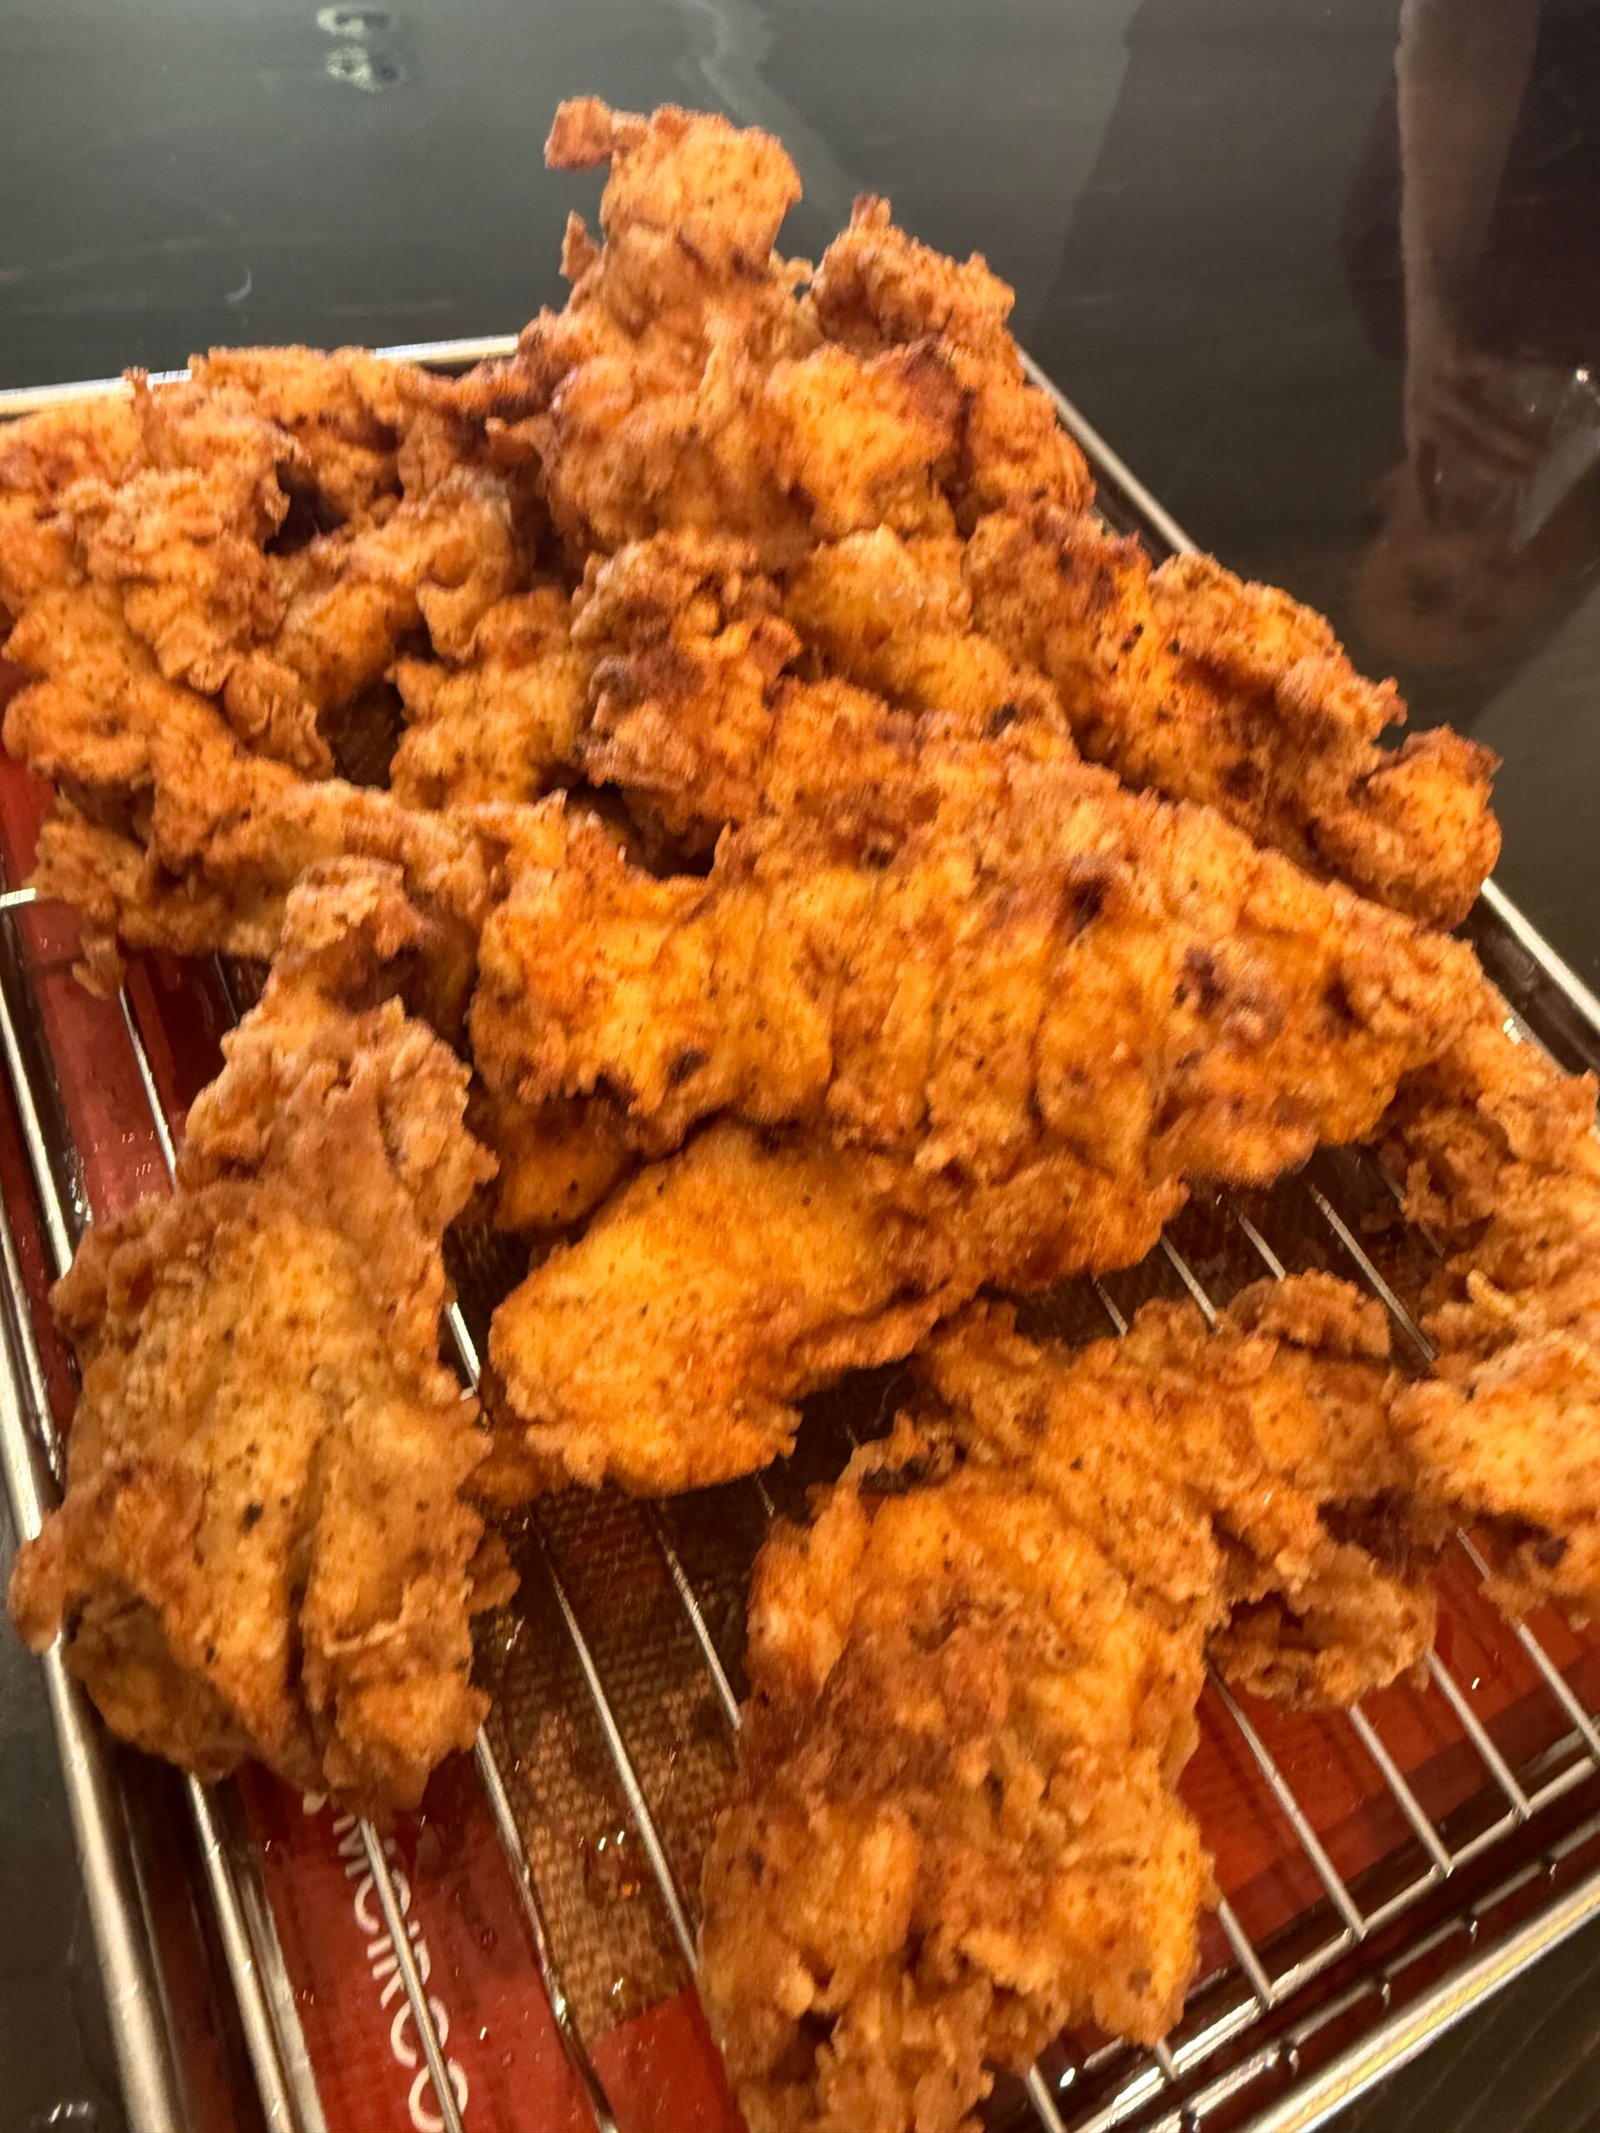
    There is nothing quite like a piece of hot, crispy fried chicken breast fresh from the skillet. Cole’s Fried Chicken starts with a seasoned buttermilk soak, then builds that beautiful rough-and-crunchy crust with a wet batter and a seasoned flour dredge.

    Serves: 4
    Marinating time: At least 1 hour; overnight recommended
    Frying temperature: 340–350°F

    Ingredients

    Buttermilk Marinade

    • 4 chicken breasts
    • 2 cups buttermilk
    • 2 teaspoons kosher salt
    • 2 teaspoons garlic powder
    • 1 teaspoon hot chili powder, such as serrano or cayenne

    Flour-Based Wet Batter

    • 1 cup all-purpose flour
    • 1 cup buttermilk, fresh or ladled from the marinade
    • 1 large egg
    • 1 teaspoon kosher salt
    • 1 teaspoon garlic powder
    • ½ teaspoon smoked paprika
    • ¼ teaspoon black pepper

    Final Dredge

    • 2 cups all-purpose flour
    • ½ cup cornstarch
    • 2½ teaspoons kosher salt
    • 1½ teaspoons smoked paprika
    • 2 teaspoons garlic powder
    • 1 teaspoon oyster mushroom powder, optional
    • ½ teaspoon freshly ground black pepper
    • 1 teaspoon cayenne pepper, optional, for extra heat
    • 1½ to 2 teaspoons baking powder
    • 2 to 3 tablespoons buttermilk, for creating crunchy flour clumps

    For Frying

    • Neutral frying oil, such as peanut or canola oil

    Instructions

    1. Marinate the chicken

    In a large bowl, whisk together the buttermilk, kosher salt, garlic powder, and hot chili powder. Add the chicken breasts and make sure they are fully coated.

    Cover and refrigerate for at least 1 hour. For the best flavor, marinate overnight.

    2. Make the wet batter

    In a medium bowl, whisk together the flour, kosher salt, garlic powder, smoked paprika, and black pepper.

    In a separate bowl, whisk the egg and buttermilk until smooth. Pour the wet mixture into the flour mixture and whisk until it becomes a smooth, pancake-like batter. It should cling to the chicken but still drip slowly from a spoon.

    If the batter is too thick, add a small splash of buttermilk or water. If it is too thin, whisk in a little more flour.

    3. Prepare the final dredge

    In a large shallow bowl or baking dish, whisk together the flour, cornstarch, kosher salt, smoked paprika, garlic powder, optional oyster mushroom powder, black pepper, optional cayenne, and baking powder.

    Just before coating the chicken, drizzle 2 to 3 tablespoons of buttermilk into the flour mixture. Toss it together with your fingers to create small flour clumps. Those clumps become the extra-craggy, crispy bits on the finished chicken.

    4. Prepare the chicken

    Remove the chicken breasts from the marinade. Pat them lightly with paper towels so they are no longer dripping but still moist.

    If the breasts are especially thick, butterfly and flatten them or gently pound them to an even thickness. This helps the chicken cook evenly.

    5. Batter and dredge

    Dip one chicken breast into the wet batter, coating it completely. Let the excess batter drip away for a couple of seconds.

    Transfer the chicken to the final dredge. Toss and press the seasoned flour firmly onto every side, making sure the flour clumps adhere well. Shake away only the loose excess—keep as much of the craggy coating as possible.

    Place the coated chicken on a wire rack. Repeat with the remaining chicken breasts.

    6. Rest the coating

    Let the coated chicken rest on the wire rack for 10 to 20 minutes. This gives the coating time to hydrate and set, helping it stay attached during frying.

    7. Fry the chicken

    Pour enough neutral oil into a heavy skillet, Dutch oven, or fryer for frying. Heat the oil to 340–350°F.

    Fry the chicken 1 to 2 pieces at a time, depending on the size of your pan. Do not crowd the oil.

    Cook until the crust is deep golden brown and the thickest part of the chicken reaches 165°F. Medium-size chicken breasts will usually take about 6 to 10 minutes, depending on their thickness and how steadily the oil holds its temperature.

    Transfer the fried chicken to a clean wire rack to drain. Avoid paper towels, which can trap steam and soften the crust.

    8. Rest and serve

    Let the chicken rest for 5 to 10 minutes before slicing or building sandwiches. This keeps the crust intact and gives the juices time to settle back into the meat.

    Notes

    • For extra heat: Use the optional cayenne in the dredge and choose a hotter chili powder for the marinade.
    • For the crispiest crust: Do not skip the wire-rack rest before frying or after frying.
    • For sandwiches: Serve on toasted buns with pickles, mayo, slaw, or your favorite hot sauce.
    • Optional umami boost: Oyster mushroom powder adds a subtle savory depth, but the recipe works great without it.
    Crispy golden-brown buttermilk fried chicken breasts with a craggy seasoned crust
    Cole

    Cole’s Fried Chicken

    Crispy, golden-brown buttermilk fried chicken breasts with a craggy seasoned crust.
    Servings: 4

    Ingredients
      

    Buttermilk Marinade
    • 4 chicken breasts
    • 2 cups buttermilk
    • 2 teaspoons kosher salt
    • 2 teaspoons garlic powder
    • 1 teaspoon hot chili powder such as serrano or cayenne
    Flour-Based Wet Batter
    • 1 cup all-purpose flour
    • 1 cup buttermilk fresh or ladled from the marinade
    • 1 large egg
    • 1 teaspoon kosher salt
    • 1 teaspoon garlic powder
    • 1/2 teaspoon smoked paprika
    • 1/4 teaspoon black pepper
    Final Dredge
    • 2 cups all-purpose flour
    • 1/2 cup cornstarch
    • 2 1/2 teaspoons kosher salt
    • 1 1/2 teaspoons smoked paprika
    • 2 teaspoons garlic powder
    • 1 teaspoon oyster mushroom powder optional
    • 1/2 teaspoon freshly ground black pepper
    • 1 teaspoon cayenne pepper optional
    • 1 1/2 to 2 teaspoons baking powder
    • 2 to 3 tablespoons buttermilk from the marinade or fresh

    Method
     

    Buttermilk Marinade
    1. Whisk together the buttermilk, kosher salt, garlic powder, and hot chili powder in a large bowl.
    2. Add the chicken breasts and coat completely.
    3. Cover and refrigerate for at least 1 hour. Overnight is best for deeper flavor.
    Make the Wet Batter
    1. Whisk together the flour, kosher salt, garlic powder, smoked paprika, and black pepper in a medium bowl.
    2. In a separate bowl, whisk the egg and buttermilk until smooth.
    3. Pour the egg-and-buttermilk mixture into the dry ingredients.
    4. Whisk until smooth and pancake-like. The batter should cling to the chicken but still drip slowly.
    5. If the batter is too thick, add a splash of buttermilk or water.
    6. If it is too thin, whisk in a little more flour.
    Prepare the Final Dredge
    1. Whisk together the flour, cornstarch, kosher salt, smoked paprika, garlic powder, optional oyster mushroom powder, black pepper, optional cayenne, and baking powder in a large shallow bowl.
    2. Just before coating the chicken, drizzle 2 to 3 tablespoons of buttermilk into the dredge.
    3. Toss with your fingers to form small flour clumps for a craggier crust.
    Coat and Fry the Chicken
    1. Remove chicken from the marinade and pat lightly with paper towels. The chicken should still be moist but not dripping.
    2. Butterfly and flatten thick chicken breasts, or gently pound them to an even thickness.
    3. Dip each chicken breast fully into the wet batter.
    4. Let the excess batter drip away for a couple of seconds.
    5. Transfer the chicken to the final dredge.
    6. Toss and press the flour mixture firmly onto all sides, making sure the flour clumps stick.
    7. Shake away only loose excess flour.
    8. Transfer coated chicken to a wire rack.
    9. Rest the chicken for 10 to 20 minutes so the coating can hydrate and set.
    10. Heat neutral oil to 340 to 350°F.
    11. Fry 1 to 2 pieces at a time without crowding the pan.
    12. Fry until deep golden brown and the thickest part reaches 165°F, about 6 to 10 minutes depending on thickness and oil temperature.
    13. Drain on a clean wire rack rather than paper towels.
    14. Rest fried chicken for 5 to 10 minutes before slicing or serving.
    Notes
    1. For extra heat, use the optional cayenne in the final dredge and a hotter chili powder in the marinade.
    2. Do not skip the wire-rack rest before frying or after frying; it helps preserve the crunchy coating.
    3. Oyster mushroom powder adds savory depth but is optional.
    4. Serve as a fried chicken dinner or use the breasts for sandwiches with toasted buns, pickles, slaw, mayonnaise, or hot sauce.