Category: Main Dishes

Everyday supper ideas, casseroles, skillet meals, and recipes for two.

  • Thin-Crust Dijon Parmesan Chicken Legs

    Thin-Crust Dijon Parmesan Chicken Legs

    When you live in West Texas, a grocery run is rarely a casual errand. It is a planned expedition: make a list, check the fuel gauge, and come home with enough dependable ingredients to carry the kitchen until the next trip to town. That is exactly why these crispy baked Dijon Parmesan chicken legs deserve a regular spot on the supper rotation.

    This easy oven-baked chicken legs recipe turns affordable drumsticks into a crunchy, flavor-packed meal without firing up a pot of oil. A thin layer of mayonnaise, Dijon mustard, and Worcestershire sauce gives the Parmesan-panko coating just enough to hold onto. Smoked paprika, garlic, onion, and oregano handle the savory side of things, while optional hot sauce, cayenne, or chipotle lets you decide whether supper needs a little West Texas attitude.

    The trick is keeping the crust thin. Nobody wants a chicken leg wrapped in a heavy bread-crumb overcoat that slides off at the first bite. These Parmesan-crusted chicken legs stay true to their name: crisp on the outside, juicy underneath, and still shaped like an honest-to-goodness drumstick. Baking them on a wire rack at high heat helps the hot air reach all sides, giving you that fried-chicken-style crunch with a whole lot less mess.

    This is also the kind of meal that makes a well-stocked pantry feel like a good investment. Panko, Parmesan, Dijon, Worcestershire, and dried spices all hold their own until they are needed, so a big grocery haul can keep paying dividends long after the bags are unpacked. Pick up chicken legs, keep a few lemons around if you can, and you have a reliable dinner that tastes like more effort than it takes.

    Serve these crispy baked chicken drumsticks with ranch-style beans, roasted potatoes, corn on the cob, coleslaw, or whatever looks good in the fridge. Keep the heat mild for a family supper, use chipotle for smoky warmth, or add cayenne for the folks who believe food should occasionally make them reconsider their choices. And if there are leftovers, cold Dijon Parmesan chicken legs the next day are not a problem. They are proof you planned ahead.
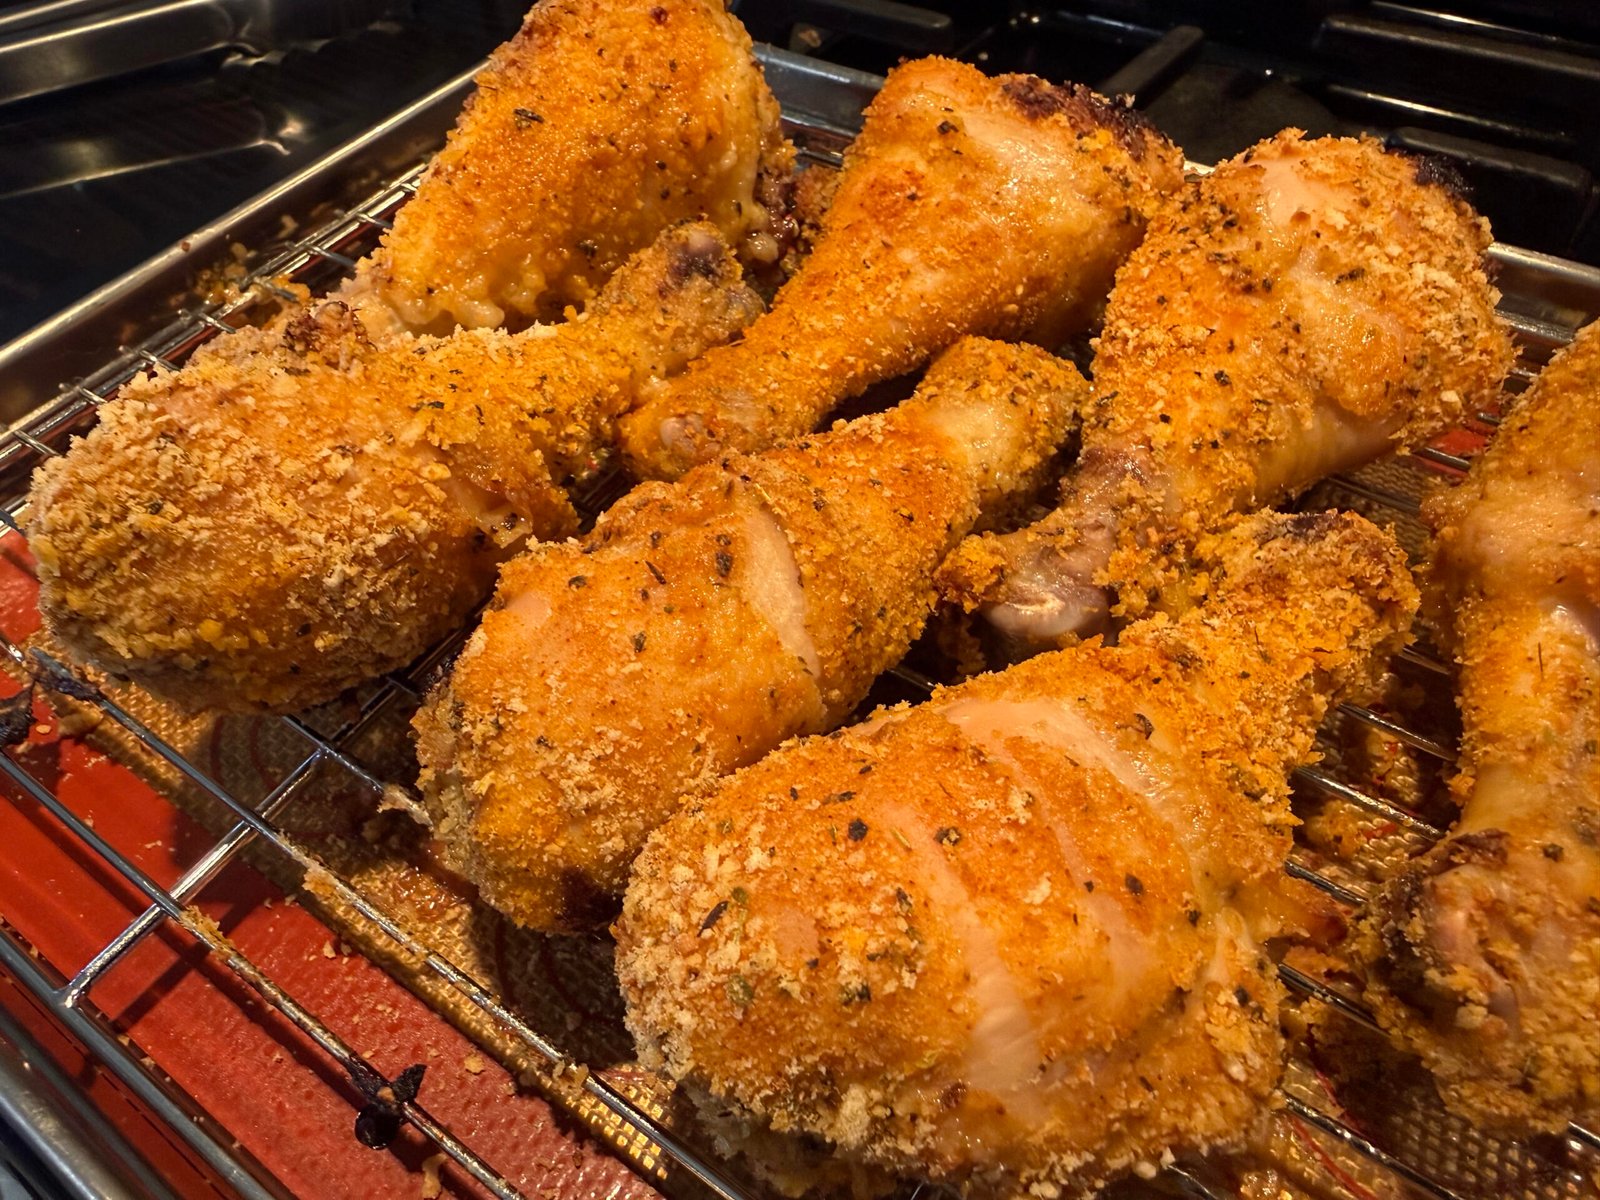
    Crispy oven-baked Dijon Parmesan chicken legs with a thin seasoned panko crust on a wire rack

    Thin-Crust Dijon Parmesan Chicken Legs

    A light, crispy Parmesan-panko crust with tangy Dijon, smoky paprika, and garlic. Baking the chicken legs on a rack at high heat helps the coating brown without frying.
    Prep Time 20 minutes
    Cook Time 45 minutes
    Total Time 1 hour
    Servings: 4
    Course: Main Course

    Ingredients
      

    Ingredients
    • 8 chicken drumsticks skin-on for the crispest result
    • 1 1/2 tbsp mayonnaise
    • 1 tbsp Dijon mustard
    • 1 tsp Worcestershire sauce
    • 1 tsp hot sauce optional
    • 1 tsp lemon zest optional but excellent
    • 3/4 cup panko breadcrumbs
    • 1/4 cup finely grated Parmesan
    • 1 tbsp all-purpose flour
    • 1 tsp smoked paprika
    • 3/4 tsp garlic powder
    • 1/2 tsp onion powder
    • 1/2 tsp dried oregano or Italian seasoning
    • 1/4 tsp cayenne or chipotle powder optional
    • 1 tsp kosher salt divided
    • 1/2 tsp black pepper
    • Avocado oil olive oil, or cooking spray
    • Lemon wedges for serving

    Method
     

    Instructions
      Method
      1. 1 Heat oven to 425°F. Put a wire rack on a foil-lined rimmed sheet pan and lightly oil or spray the rack. The rack helps circulate heat so the bottoms crisp instead of steaming.
      2. 2 Dry and prep the legs. Pat the drumsticks very dry. Pull the skin smooth over the meat where you can; trim off any big hanging pieces of skin or fat. Season the chicken with 1/2 teaspoon kosher salt and the black pepper.
      3. 3 Make the thin wet coating. Stir together the mayonnaise, Dijon, Worcestershire, hot sauce, and lemon zest. Brush a very thin layer over each drumstick—don’t slather it. The point is adhesion and flavor, not a thick sauce layer. Mayo is especially useful here because it helps the crumbs cling without an egg-and-flour assembly line.
      4. 4 Make the crumbs. Mix panko, Parmesan, flour, paprika, garlic powder, onion powder, oregano, cayenne/chipotle if using, and the remaining 1/2 teaspoon salt.
      5. 5 Coat lightly. Roll each leg in the crumbs and gently press just enough to adhere. Shake off everything loose. You should still see the shape and skin of the leg beneath the coating—this is not a Shake ’n Bake–thick crust.
      6. 6 Bake. Set legs on the rack with space between them. Spray or lightly drizzle the tops with oil. Bake 20 minutes, turn, spray the newly exposed side lightly, then bake another 20–25 minutes.
      7. 7 Finish by temperature, not just time. Check the thickest part of the meat near—but not touching—the bone. Chicken is safe at 165°F, but drumsticks are often more tender and satisfying around 175–180°F.
      8. 8 Rest 5 minutes. Hit them with a squeeze of lemon right before serving.

      Notes

      Notes
      Why this should hit right
      Flavorful but not thick: Only 3/4 cup panko plus Parmesan for eight legs, and the mayo-Dijon layer is brushed on thin.
      Crisp without frying: High heat, oil spray, and a rack give you a browned, crunchy surface. Recipes using rack baking and high heat emphasize this for crisping both sides.
      Not bland: Dijon, Worcestershire, Parmesan, smoked paprika, garlic, onion, and lemon make it more like a good seasoned chicken dinner than plain breadcrumbs.
      A little Texas-friendly heat: The optional chipotle or cayenne is subtle, not “hot chicken” level.

      Serving Ideas

      Serve these chicken legs with roasted potatoes, ranch-style beans, corn on the cob, coleslaw, or a simple green salad. They are also good cold from the refrigerator the next day—especially with a little extra Dijon or hot sauce on the side.

      Recipe Notes

      • For the crispiest skin: Do not skip drying the drumsticks thoroughly before seasoning.
      • Use finely grated Parmesan: The shelf-stable grated kind or finely shredded Parmesan blends into the crumbs more evenly than large shavings.
      • Avoid overcrowding: Leave space between the drumsticks so heat can circulate and the coating can crisp.
      • No wire rack? Bake directly on a lightly oiled sheet pan, but turn the drumsticks carefully halfway through. The underside may not get quite as crisp.
      • Heat level: The hot sauce and cayenne or chipotle are optional. Leave them out for a kid-friendly version, or use chipotle for a gentler smoky warmth.
    1. Chicken Cordon Bleu with Brie and Green Peppercorn Sauce

      Chicken Cordon Bleu with Brie and Green Peppercorn Sauce

      There is something wonderfully old-school and celebratory about chicken cordon bleu. It is the kind of dinner that looks right at home on a special-occasion table, yet it is completely doable in an ordinary home kitchen with a little patience and a few good ingredients.

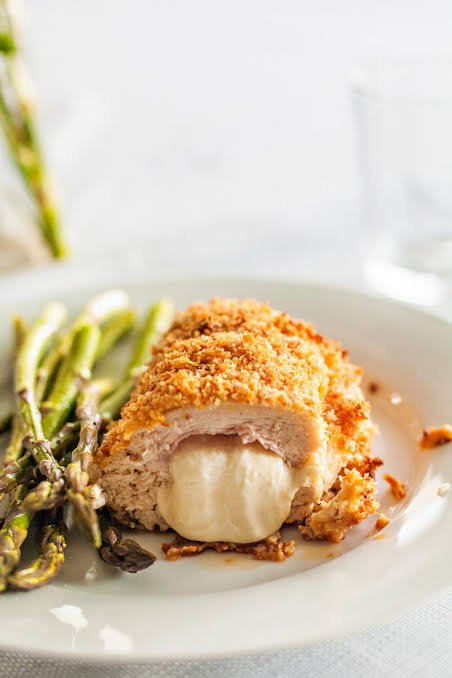
      This version takes the familiar combination of chicken, ham, and cheese in a richer direction by using creamy Brie. Tucked inside thin, tender chicken breasts with Black Forest ham or prosciutto, the Brie melts into a soft, savory center that feels just a little more luxurious than the standard version. A crisp panko or cracker-crumb crust gives every slice that satisfying crunch, while the chicken stays juicy inside.

      The real finishing touch is the green peppercorn sauce. Built with shallot, beef stock, fresh tarragon, Cognac, and a little cream, it has a deep, steakhouse-style character that works beautifully with the mild chicken and earthy, buttery Brie. The green peppercorns add gentle warmth and a bright pop of flavor rather than overwhelming heat.

      A few keys to success

      The most important part of this recipe is keeping the chicken rolls cold. After rolling the chicken around the ham and Brie, chilling firms everything up so it holds together when breaded and browned. A second chill after breading helps the crust stay put instead of slipping off in the pan.

      Do not overstuff the chicken. A modest layer of Brie is all you need; too much cheese can escape during cooking and make it harder to keep that neat spiral when slicing. Leave a small border around the edges of the chicken as you layer the filling, then roll it snugly.

      Brown the rolls gently before moving them to the oven. You are looking for a light golden crust—not a fully cooked interior at this stage. Finishing in a 375°F oven gives you better control and ensures the chicken reaches 165°F without over-darkening the breadcrumbs.

      Serving ideas

      Slice each rested chicken roll into thick medallions so the ham-and-Brie spiral shows off. Spoon the glossy peppercorn sauce over the top, or serve it alongside for guests to add as they like.

      This dish pairs especially well with:

      • Roasted asparagus, green beans, or broccolini
      • Garlic mashed potatoes or a creamy potato gratin
      • Wild rice or buttered egg noodles
      • A simple crisp salad with a tangy vinaigrette
      • A glass of dry white wine, or a small pour of the Madeira or Port used in the sauce

      For a true dinner-party presentation, arrange the sliced chicken on a warm platter and scatter a few whole green peppercorns around the sauce. It is elegant enough for company, but comforting enough to make a regular weeknight feel like an occasion.

      Breaded chicken cordon bleu stuffed with melted cheese, served with roasted asparagus.

      Chicken Cordon Bleu with Brie

      Course: Main Course

      Ingredients
        

      Ingredients
      For the chicken:
      • – 2 boneless skinless chicken breasts (6–8 oz each)
      • – 4 thin slices Black Forest ham or prosciutto
      • – 2–3 oz Brie or Swiss cheese cut into thin slices
      • – Salt and freshly ground black pepper to taste
      • – 2 cups flour for dredging
      • – 3 large eggs lightly beaten
      • – 2 cups panko or cracker crumbs
      • – 1/4 cup freshly grated Parmesan optional; mix into crumbs
      • – 1/4 cup olive oil or other high-heat cooking oil
      For the green peppercorn sauce:
      • – 2 tablespoons butter
      • – About 2 tablespoons shallot finely diced
      • – 2 tablespoons green peppercorns divided
      • – 1 teaspoon fresh tarragon chopped
      • sage may be substituted
      • – 1/4 cup Madeira or Port wine optional
      • – 1 cup beef stock
      • – 1 teaspoon freshly cracked black pepper
      • – 1/4 cup Cognac
      • – About 3 tablespoons heavy whipping cream
      • – Salt to taste
      • – 2 tablespoons cold butter to finish
      • – Cornstarch mixed with cold water optional, for thickening

      Method
       

      Instructions
      1. 1 1. Preheat oven to 375°F.
      2. 2 2. Butterfly each chicken breast: Place it flat and slice horizontally through the thicker side, stopping short of cutting all the way through. Open it like a book.
      3. 3 3. Cover the chicken with plastic wrap and gently pound it evenly. Pound the outer edges a little thinner than the center so the roll seals better.
      4. 4 4. Season the chicken with salt and pepper. Lay 2 slices of ham over each breast, leaving a border around the edges. Add a modest layer of thinly sliced Brie. Do not overfill.
      5. 5 5. Roll each breast tightly into a cylinder. Use plastic wrap to help form the roll: wrap it tightly, then twist the ends like a candy wrapper to compact and secure it.
      6. 6 6. Refrigerate the wrapped chicken rolls for at least 1 hour or in the freezer for 20 minutes, until very cold and firm.
      7. 7 7. Set up a breading station:
      8. 8 – Dish 1: flour seasoned with salt and pepper
      9. 9 – Dish 2: beaten eggs
      10. 10 – Dish 3: panko or cracker crumbs, optionally mixed with Parmesan
      11. 11 8. Carefully unwrap each cold chicken roll. Dredge in flour, coat in egg, then cover thoroughly in crumbs. Place on parchment paper and refrigerate again for at least 1 hour or in the freezer for 15-20 minutes so the coating firms up.
      12. 12 9. Heat the oil in a sauté pan to about 365°F. Carefully brown the chicken rolls on all sides until lightly golden.
      13. 13 10. Transfer to a parchment-lined baking sheet. Bake about 10 minutes, or until the thickest part of the chicken reaches 165°F.
      14. 14 11. Rest the chicken for 5 minutes before slicing and serving.
      Green Peppercorn Sauce
      1. 1 1. Melt 2 tablespoons butter in a saucepan over medium heat. Add the shallot and sauté until soft and lightly golden.
      2. 2 2. Add 1 tablespoon green peppercorns, the tarragon, and the Madeira or Port, if using. Add the beef stock and cracked black pepper.
      3. 3 3. Simmer 10–15 minutes to reduce slightly. Strain the sauce through a fine sieve if you want it smooth.
      4. 4 4. Return the strained sauce to the pan. Add the remaining 1 tablespoon green peppercorns, heavy cream, and Cognac.
      5. 5 5. Simmer until it reaches your preferred consistency. If needed, thicken carefully with a small amount of cornstarch slurry.
      6. 6 6. Remove from heat. When the sauce is no longer boiling, whisk in the final 2 tablespoons butter until glossy and smooth.
      7. 7 7. Slice the rested chicken cordon bleu and spoon the sauce over or alongside it.
    2. Crispy Chicken Milanesa with Lemon-Caper Butter Sauce

      Crispy Chicken Milanesa with Lemon-Caper Butter Sauce

      This crispy chicken milanesa is a simple, satisfying dinner with a golden panko-Parmesan crust and tender chicken inside. Finish it with fresh lemon and a light drizzle of lemon-caper butter sauce for a restaurant-style meal that comes together quickly.

      Yield: Serves 2–3
      Prep time: 20 minutes
      Cook time: 15 minutes
      Total time: About 35 minutes

      Ingredients

      • 2 large boneless, skinless chicken breasts
      • Salt and freshly ground black pepper, to taste
      • 1/2 cup all-purpose flour
      • 2 large eggs
      • 1 tablespoon water or milk
      • 1 to 1 1/2 cups panko breadcrumbs
      • 1/4 cup finely grated Parmesan cheese, optional but highly recommended
      • 1/2 teaspoon garlic powder
      • 1/2 teaspoon dried oregano or Italian seasoning
      • Neutral oil for shallow frying, such as avocado, canola, or vegetable oil
      • Lemon wedges, for serving
      • Lemon-caper butter sauce, for serving

      Instructions

      Prepare the chicken

      Slice each chicken breast horizontally to make two thinner cutlets. You should have four cutlets total.

      Place the chicken between sheets of plastic wrap, or inside a cut-open freezer bag. Gently pound the chicken with a meat mallet, heavy skillet, or rolling pin until each cutlet is an even 1/4-inch thick.

      Season both sides of the chicken lightly with salt and black pepper. Keeping the cutlets thin and even helps them cook quickly without drying out.

      Set up the breading station

      Arrange three shallow dishes or pie plates on your counter.

      • In the first dish, combine the flour with a pinch of salt and pepper.
      • In the second dish, whisk together the eggs and water or milk.
      • In the third dish, stir together the panko breadcrumbs, Parmesan, garlic powder, oregano, and a pinch of salt.

      Working with one cutlet at a time, coat the chicken in flour, shaking off any extra. Dip it into the egg mixture, letting the excess drip away. Then press it firmly into the seasoned panko mixture, coating both sides well.

      Place the breaded cutlets on a wire rack or plate and let them rest for 5 to 10 minutes. This small step helps the breading stick to the chicken instead of slipping off in the skillet.

      Fry the milanesa

      Pour about 1/4 inch of oil into a large skillet and heat it over medium to medium-high heat. The oil is ready when it shimmers but does not smoke; about 350°F is ideal.

      Fry the chicken in batches, leaving room between the cutlets so the oil temperature stays steady and the crust gets properly crisp.

      Cook each thin cutlet for about 3 to 4 minutes per side, until deeply golden brown and crunchy. If any pieces are thicker, allow them a little more time.

      Transfer the cooked chicken to a wire rack and immediately season with a small pinch of salt. Repeat with the remaining cutlets. The chicken is ready when it reaches 165°F at its thickest point.

      Serve

      Serve the chicken milanesa hot with lemon wedges. Squeeze fresh lemon juice over each cutlet, then drizzle lightly with lemon-caper butter sauce.

      For the crispiest result, serve extra sauce on the side rather than covering the entire cutlet. Pair it with a simple arugula salad, roasted potatoes, buttered noodles, or a scoop of rice.

      Tips for the Best Milanesa

      • Use panko rather than regular breadcrumbs for a lighter, crunchier coating.
      • Do not overcrowd the skillet. Crowding traps steam and can make the breading soft.
      • A wire rack is better than paper towels for draining because it keeps air moving around the crust.
      • Parmesan adds a savory, slightly nutty flavor, but the recipe still works well without it.
      • If making ahead, keep cooked cutlets warm on a wire rack in a 200°F oven until ready to serve.

      Related Recipes


      Fast Lemon-Caper Butter Sauce

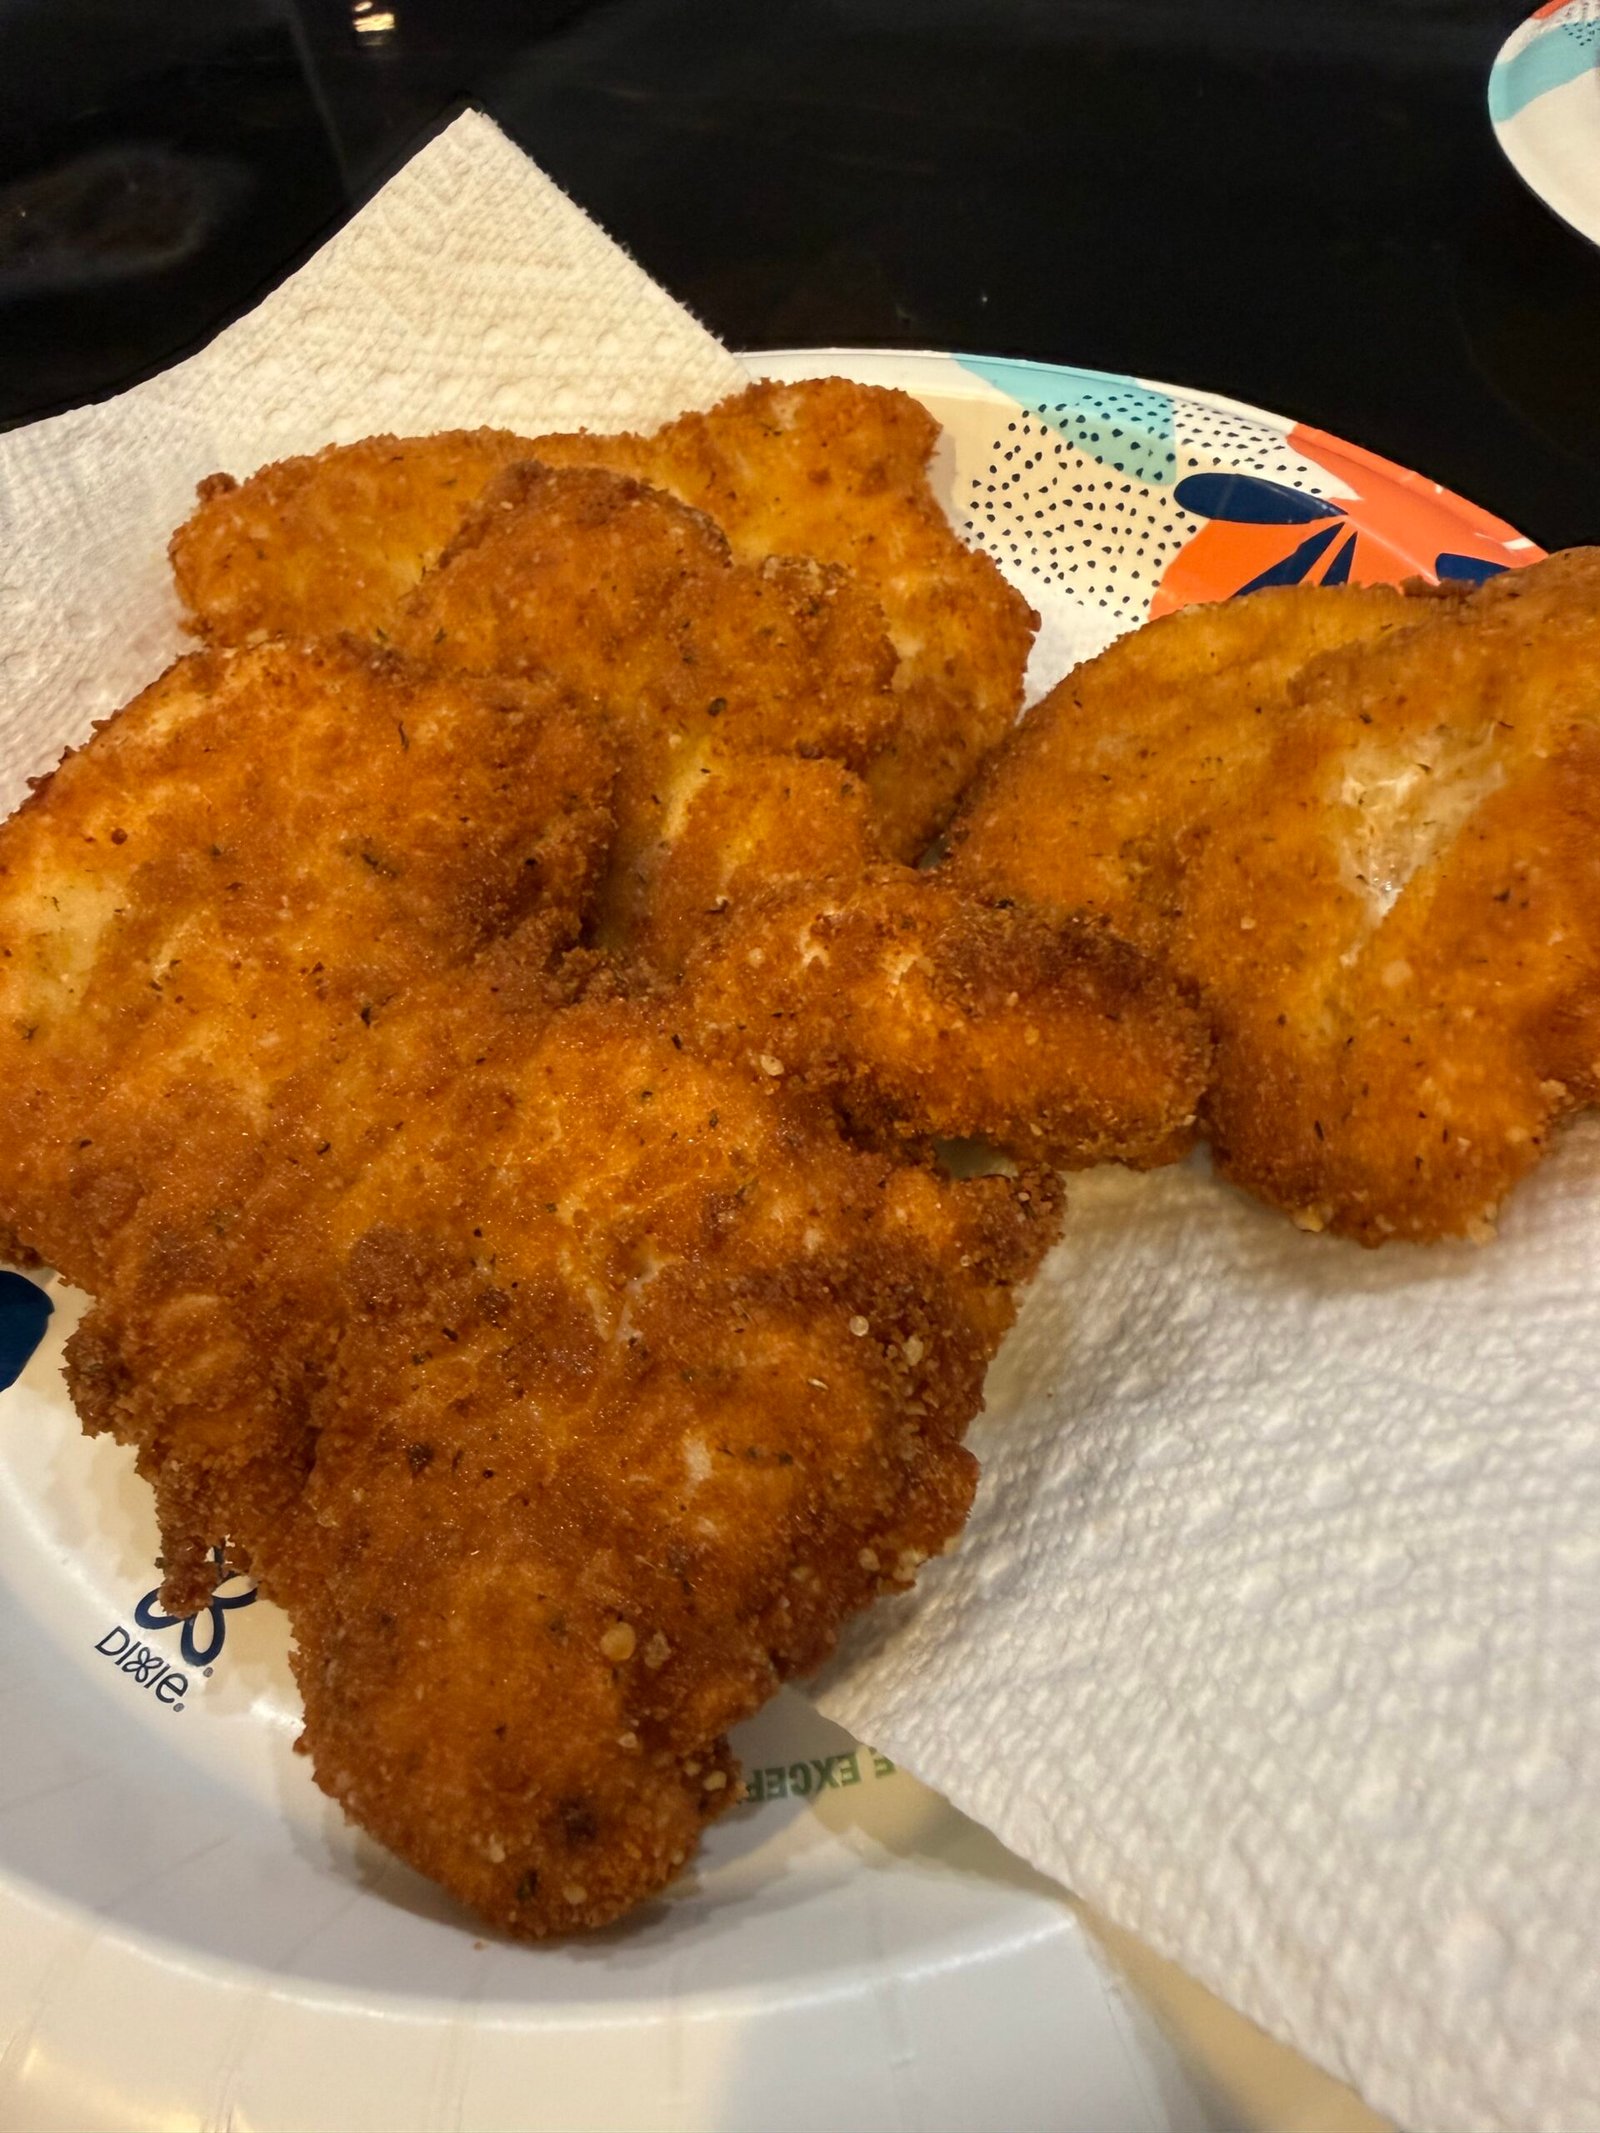
      Crispy golden-brown chicken milanesa cutlets resting on a wire rack after frying.

      Crispy Chicken Milanesa with Lemon-Caper Butter Sauce

      This crispy chicken milanesa is a simple, satisfying dinner with a golden panko-Parmesan crust and tender chicken inside. Finish it with fresh lemon and a light drizzle of lemon-caper butter sauce for a restaurant-style meal that comes together quickly.
      Prep Time 20 minutes
      Cook Time 15 minutes
      Total Time 35 minutes
      Course: Main Course

      Ingredients
        

      Ingredients
      • 2 large boneless skinless chicken breasts
      • Salt and freshly ground black pepper to taste
      • 1/2 cup all-purpose flour
      • 2 large eggs
      • 1 tablespoon water or milk
      • 1 to 1 1/2 cups panko breadcrumbs
      • 1/4 cup finely grated Parmesan cheese optional but highly recommended
      • 1/2 teaspoon garlic powder
      • 1/2 teaspoon dried oregano or Italian seasoning
      • Neutral oil for shallow frying such as avocado, canola, or vegetable oil
      • Lemon wedges for serving
      • Lemon-caper butter sauce for serving

      Method
       

      Instructions
        Prepare the chicken
        1. Slice each chicken breast horizontally to make two thinner cutlets. You should have four cutlets total.
        2. Place the chicken between sheets of plastic wrap, or inside a cut-open freezer bag. Gently pound the chicken with a meat mallet, heavy skillet, or rolling pin until each cutlet is an even 1/4-inch thick.
        3. Season both sides of the chicken lightly with salt and black pepper. Keeping the cutlets thin and even helps them cook quickly without drying out.
        Set up the breading station
        1. Arrange three shallow dishes or pie plates on your counter.
        2. In the first dish, combine the flour with a pinch of salt and pepper.
        3. In the second dish, whisk together the eggs and water or milk.
        4. In the third dish, stir together the panko breadcrumbs, Parmesan, garlic powder, oregano, and a pinch of salt.
        5. Working with one cutlet at a time, coat the chicken in flour, shaking off any extra. Dip it into the egg mixture, letting the excess drip away. Then press it firmly into the seasoned panko mixture, coating both sides well.
        6. Place the breaded cutlets on a wire rack or plate and let them rest for 5 to 10 minutes. This small step helps the breading stick to the chicken instead of slipping off in the skillet.
        Fry the milanesa
        1. Pour about 1/4 inch of oil into a large skillet and heat it over medium to medium-high heat. The oil is ready when it shimmers but does not smoke; about 350°F is ideal.
        2. Fry the chicken in batches, leaving room between the cutlets so the oil temperature stays steady and the crust gets properly crisp.
        3. Cook each thin cutlet for about 3 to 4 minutes per side, until deeply golden brown and crunchy. If any pieces are thicker, allow them a little more time.
        4. Transfer the cooked chicken to a wire rack and immediately season with a small pinch of salt. Repeat with the remaining cutlets. The chicken is ready when it reaches 165°F at its thickest point.
        Serve
        1. Serve the chicken milanesa hot with lemon wedges. Squeeze fresh lemon juice over each cutlet, then drizzle lightly with lemon-caper butter sauce.
        2. For the crispiest result, serve extra sauce on the side rather than covering the entire cutlet. Pair it with a simple arugula salad, roasted potatoes, buttered noodles, or a scoop of rice.

        Notes

        Tips for the Best Milanesa
        Use panko rather than regular breadcrumbs for a lighter, crunchier coating.
        Do not overcrowd the skillet. Crowding traps steam and can make the breading soft.
        A wire rack is better than paper towels for draining because it keeps air moving around the crust.
        Parmesan adds a savory, slightly nutty flavor, but the recipe still works well without it.
        If making ahead, keep cooked cutlets warm on a wire rack in a 200°F oven until ready to serve.
      1. Skillet-Seared Glazed Meatloaf

        Skillet-Seared Glazed Meatloaf

        This hearty, old-fashioned meatloaf is baked until tender, chilled for clean slicing, then seared in a hot skillet with a sticky ketchup glaze. The result is a savory, crispy-edged slice of meatloaf that is perfect with mashed potatoes and green beans—or piled onto sandwich bread the next day.

        The chilling step is the secret to getting thick, neat slices that hold together in the skillet. A quick sear adds a browned crust, while the sweet-and-tangy glaze turns dark, glossy, and caramelized.

        Ingredients

        For the Meatloaf

        • 2 pounds ground beef
        • 2 eggs
        • ¾ to 1 cup breadcrumbs or panko
        • ½ cup milk
        • 1 small onion, finely diced
        • 2 teaspoons Worcestershire sauce
        • 1 teaspoon kosher salt
        • ½ teaspoon black pepper
        • 2 cloves garlic, minced

        For the Glaze

        • ½ cup ketchup
        • 1 tablespoon yellow mustard or Dijon mustard
        • 1 to 1½ tablespoons honey or brown sugar
        • 1 teaspoon Worcestershire sauce
        • 1 teaspoon apple cider vinegar

        Instructions

        Bake the Meatloaf

        1. Preheat the oven to 350°F.
        2. In a large mixing bowl, combine the ground beef, eggs, breadcrumbs, milk, diced onion, Worcestershire sauce, salt, pepper, and minced garlic.
        3. Mix everything just until combined. Do not overwork the meat mixture, or the finished meatloaf can become dense and tough.
        4. Shape the mixture into a free-form loaf on a sheet pan or in a shallow baking dish.
        5. In a small bowl, stir together the ketchup, mustard, honey or brown sugar, Worcestershire sauce, and apple cider vinegar.
        6. Brush a thin layer of glaze over the top of the meatloaf. Reserve the remaining glaze for the skillet-searing step.
        7. Bake until the meatloaf is fully cooked through and reaches 160°F in the center. A 2-pound loaf will usually take about 1 hour. A 1-pound loaf generally takes 30 to 45 minutes.
        8. Let the meatloaf rest for 10 to 15 minutes. For the best skillet-seared slices, refrigerate the cooked loaf for at least 1 to 2 hours, or overnight, until firm.

        Sear the Slices

        1. Slice the cold meatloaf into thick pieces, about ¾-inch to 1-inch thick. Thick slices are less likely to break apart while flipping.
        2. Heat a cast-iron skillet or other heavy skillet over medium to medium-high heat. Add a small amount of oil.
        3. Place the meatloaf slices in the hot skillet and sear the first side for 1 to 2 minutes, until browned and crisp around the edges.
        4. Brush a very thin layer of glaze over the top side of each slice. Flip and cook for another 1 to 2 minutes, allowing the glaze to darken and become sticky.
        5. Flip once more and briefly sear the glazed side again to caramelize the surface.
        6. Reduce the heat slightly if the glaze starts browning too quickly. The sugars in the honey or brown sugar can burn if the skillet is too hot.
        7. Serve hot with extra glaze on the side if desired.

        Tips for the Best Meatloaf

        • Do not overmix. Mix only until the ingredients are evenly distributed. Overworking ground beef can make meatloaf tight and heavy.
        • Use ¾ cup breadcrumbs for a softer, more tender loaf. Use closer to 1 cup if your ground beef mixture seems especially wet.
        • Chilling the baked meatloaf makes a big difference. It firms up the loaf, helps it slice neatly, and prevents it from falling apart in the skillet.
        • If your meatloaf tends to crumble, try adding a little more breadcrumb or one additional egg the next time.
        • For an even crispier crust, lightly dust each cold slice with flour before searing. Keep the coating very light so the glaze can still stick properly.

        Serving Ideas

        This skillet-seared meatloaf is especially good with:

        • Creamy mashed potatoes
        • Buttered green beans
        • Corn on the cob or fried corn
        • Macaroni and cheese
        • Roasted potatoes
        • Thick white sandwich bread with extra glaze

        For a great leftover sandwich, layer a warm skillet-seared slice between toasted bread with lettuce, tomato, pickles, or a little extra mustard.

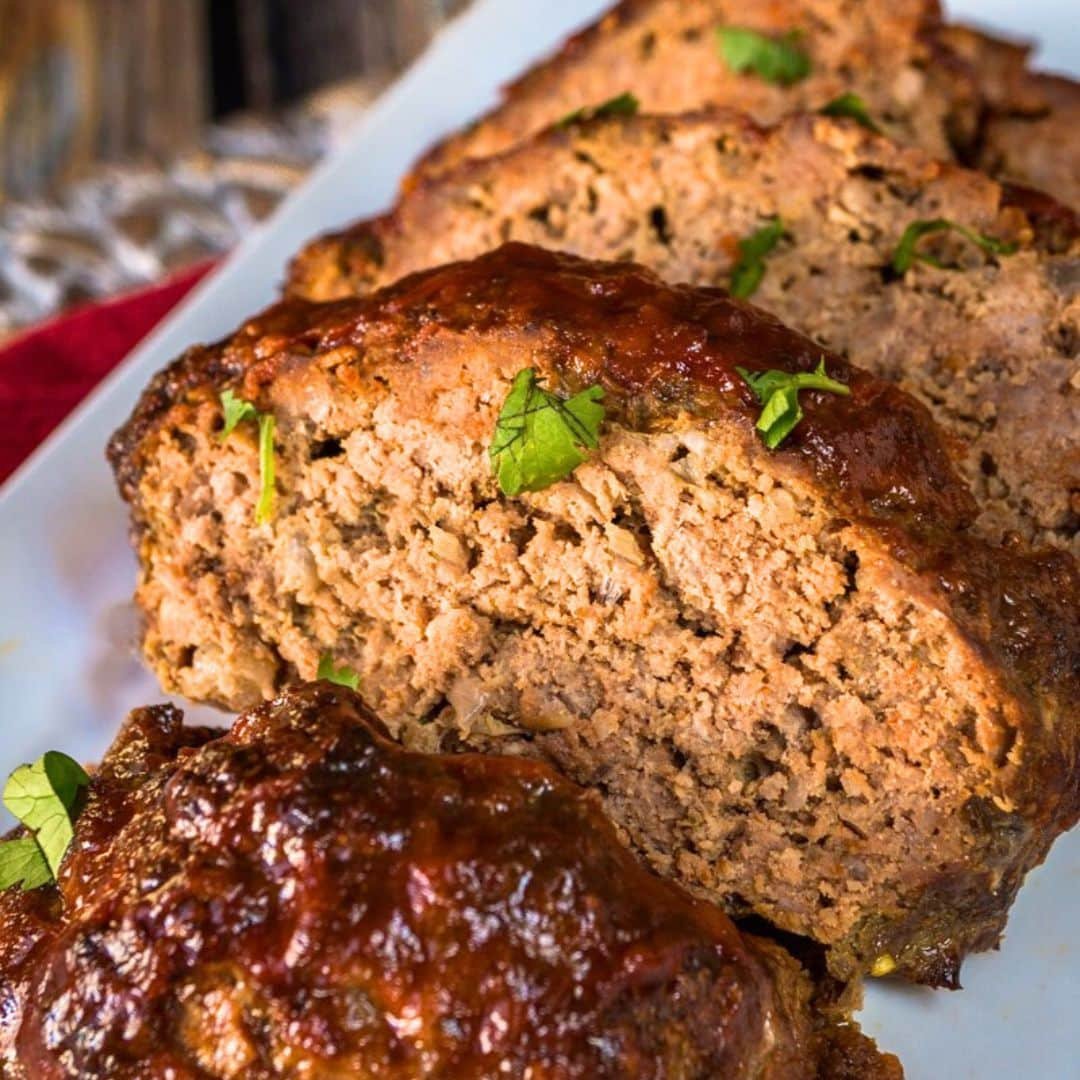
        Skillet-seared slices of glazed homemade meatloaf on a white platter, topped with fresh parsley.
        Cole

        Skillet-Seared Glazed Meatloaf

        This hearty, old-fashioned meatloaf is baked until tender, chilled for clean slicing, then seared in a hot skillet with a sticky ketchup glaze. The result is a savory, crispy-edged slice of meatloaf that is perfect with mashed potatoes and green beans—or piled onto sandwich bread the next day.
        Prep Time 15 minutes
        Cook Time 1 hour 10 minutes
        Total Time 3 hours
        Course: Main Course

        Ingredients
          

        Ingredients
        For the Meatloaf
        • 2 pounds ground beef
        • 2 eggs
        • ¾ to 1 cup breadcrumbs or panko
        • ½ cup milk
        • 1 small onion finely diced
        • 2 teaspoons Worcestershire sauce
        • 1 teaspoon kosher salt
        • ½ teaspoon black pepper
        • 2 cloves garlic minced
        For the Glaze
        • ½ cup ketchup
        • 1 tablespoon yellow mustard or Dijon mustard
        • 1 to 1½ tablespoons honey or brown sugar
        • 1 teaspoon Worcestershire sauce
        • 1 teaspoon apple cider vinegar

        Method
         

        Instructions
          Bake the Meatloaf
          1. Preheat the oven to 350°F.
          2. In a large mixing bowl, combine the ground beef, eggs, breadcrumbs, milk, diced onion, Worcestershire sauce, salt, pepper, and minced garlic.
          3. Mix everything just until combined. Do not overwork the meat mixture, or the finished meatloaf can become dense and tough.
          4. Shape the mixture into a free-form loaf on a sheet pan or in a shallow baking dish.
          5. In a small bowl, stir together the ketchup, mustard, honey or brown sugar, Worcestershire sauce, and apple cider vinegar.
          6. Brush a thin layer of glaze over the top of the meatloaf. Reserve the remaining glaze for the skillet-searing step.
          7. Bake until the meatloaf is fully cooked through and reaches 160°F in the center. A 2-pound loaf will usually take about 1 hour. A 1-pound loaf generally takes 30 to 45 minutes.
          8. Let the meatloaf rest for 10 to 15 minutes. For the best skillet-seared slices, refrigerate the cooked loaf for at least 1 to 2 hours, or overnight, until firm.
          Sear the Slices
          1. Slice the cold meatloaf into thick pieces, about ¾-inch to 1-inch thick. Thick slices are less likely to break apart while flipping.
          2. Heat a cast-iron skillet or other heavy skillet over medium to medium-high heat. Add a small amount of oil.
          3. Place the meatloaf slices in the hot skillet and sear the first side for 1 to 2 minutes, until browned and crisp around the edges.
          4. Brush a very thin layer of glaze over the top side of each slice. Flip and cook for another 1 to 2 minutes, allowing the glaze to darken and become sticky.
          5. Flip once more and briefly sear the glazed side again to caramelize the surface.
          6. Reduce the heat slightly if the glaze starts browning too quickly. The sugars in the honey or brown sugar can burn if the skillet is too hot.
          7. Serve hot with extra glaze on the side if desired.
        1. Cole’s Fried Chicken | Crispy Buttermilk Chicken Breast Recipe

          Cole’s Fried Chicken | Crispy Buttermilk Chicken Breast Recipe

          There is nothing quite like a piece of hot, crispy fried chicken breast fresh from the skillet. Cole’s Fried Chicken starts with a seasoned buttermilk soak, then builds that beautiful rough-and-crunchy crust with a wet batter and a seasoned flour dredge.

          Serves: 4
          Marinating time: At least 1 hour; overnight recommended
          Frying temperature: 340–350°F

          Ingredients

          Buttermilk Marinade

          • 4 chicken breasts
          • 2 cups buttermilk
          • 2 teaspoons kosher salt
          • 2 teaspoons garlic powder
          • 1 teaspoon hot chili powder, such as serrano or cayenne

          Flour-Based Wet Batter

          • 1 cup all-purpose flour
          • 1 cup buttermilk, fresh or ladled from the marinade
          • 1 large egg
          • 1 teaspoon kosher salt
          • 1 teaspoon garlic powder
          • ½ teaspoon smoked paprika
          • ¼ teaspoon black pepper

          Final Dredge

          • 2 cups all-purpose flour
          • ½ cup cornstarch
          • 2½ teaspoons kosher salt
          • 1½ teaspoons smoked paprika
          • 2 teaspoons garlic powder
          • 1 teaspoon oyster mushroom powder, optional
          • ½ teaspoon freshly ground black pepper
          • 1 teaspoon cayenne pepper, optional, for extra heat
          • 1½ to 2 teaspoons baking powder
          • 2 to 3 tablespoons buttermilk, for creating crunchy flour clumps

          For Frying

          • Neutral frying oil, such as peanut or canola oil

          Instructions

          1. Marinate the chicken

          In a large bowl, whisk together the buttermilk, kosher salt, garlic powder, and hot chili powder. Add the chicken breasts and make sure they are fully coated.

          Cover and refrigerate for at least 1 hour. For the best flavor, marinate overnight.

          2. Make the wet batter

          In a medium bowl, whisk together the flour, kosher salt, garlic powder, smoked paprika, and black pepper.

          In a separate bowl, whisk the egg and buttermilk until smooth. Pour the wet mixture into the flour mixture and whisk until it becomes a smooth, pancake-like batter. It should cling to the chicken but still drip slowly from a spoon.

          If the batter is too thick, add a small splash of buttermilk or water. If it is too thin, whisk in a little more flour.

          3. Prepare the final dredge

          In a large shallow bowl or baking dish, whisk together the flour, cornstarch, kosher salt, smoked paprika, garlic powder, optional oyster mushroom powder, black pepper, optional cayenne, and baking powder.

          Just before coating the chicken, drizzle 2 to 3 tablespoons of buttermilk into the flour mixture. Toss it together with your fingers to create small flour clumps. Those clumps become the extra-craggy, crispy bits on the finished chicken.

          4. Prepare the chicken

          Remove the chicken breasts from the marinade. Pat them lightly with paper towels so they are no longer dripping but still moist.

          If the breasts are especially thick, butterfly and flatten them or gently pound them to an even thickness. This helps the chicken cook evenly.

          5. Batter and dredge

          Dip one chicken breast into the wet batter, coating it completely. Let the excess batter drip away for a couple of seconds.

          Transfer the chicken to the final dredge. Toss and press the seasoned flour firmly onto every side, making sure the flour clumps adhere well. Shake away only the loose excess—keep as much of the craggy coating as possible.

          Place the coated chicken on a wire rack. Repeat with the remaining chicken breasts.

          6. Rest the coating

          Let the coated chicken rest on the wire rack for 10 to 20 minutes. This gives the coating time to hydrate and set, helping it stay attached during frying.

          7. Fry the chicken

          Pour enough neutral oil into a heavy skillet, Dutch oven, or fryer for frying. Heat the oil to 340–350°F.

          Fry the chicken 1 to 2 pieces at a time, depending on the size of your pan. Do not crowd the oil.

          Cook until the crust is deep golden brown and the thickest part of the chicken reaches 165°F. Medium-size chicken breasts will usually take about 6 to 10 minutes, depending on their thickness and how steadily the oil holds its temperature.

          Transfer the fried chicken to a clean wire rack to drain. Avoid paper towels, which can trap steam and soften the crust.

          8. Rest and serve

          Let the chicken rest for 5 to 10 minutes before slicing or building sandwiches. This keeps the crust intact and gives the juices time to settle back into the meat.

          Notes

          • For extra heat: Use the optional cayenne in the dredge and choose a hotter chili powder for the marinade.
          • For the crispiest crust: Do not skip the wire-rack rest before frying or after frying.
          • For sandwiches: Serve on toasted buns with pickles, mayo, slaw, or your favorite hot sauce.
          • Optional umami boost: Oyster mushroom powder adds a subtle savory depth, but the recipe works great without it.
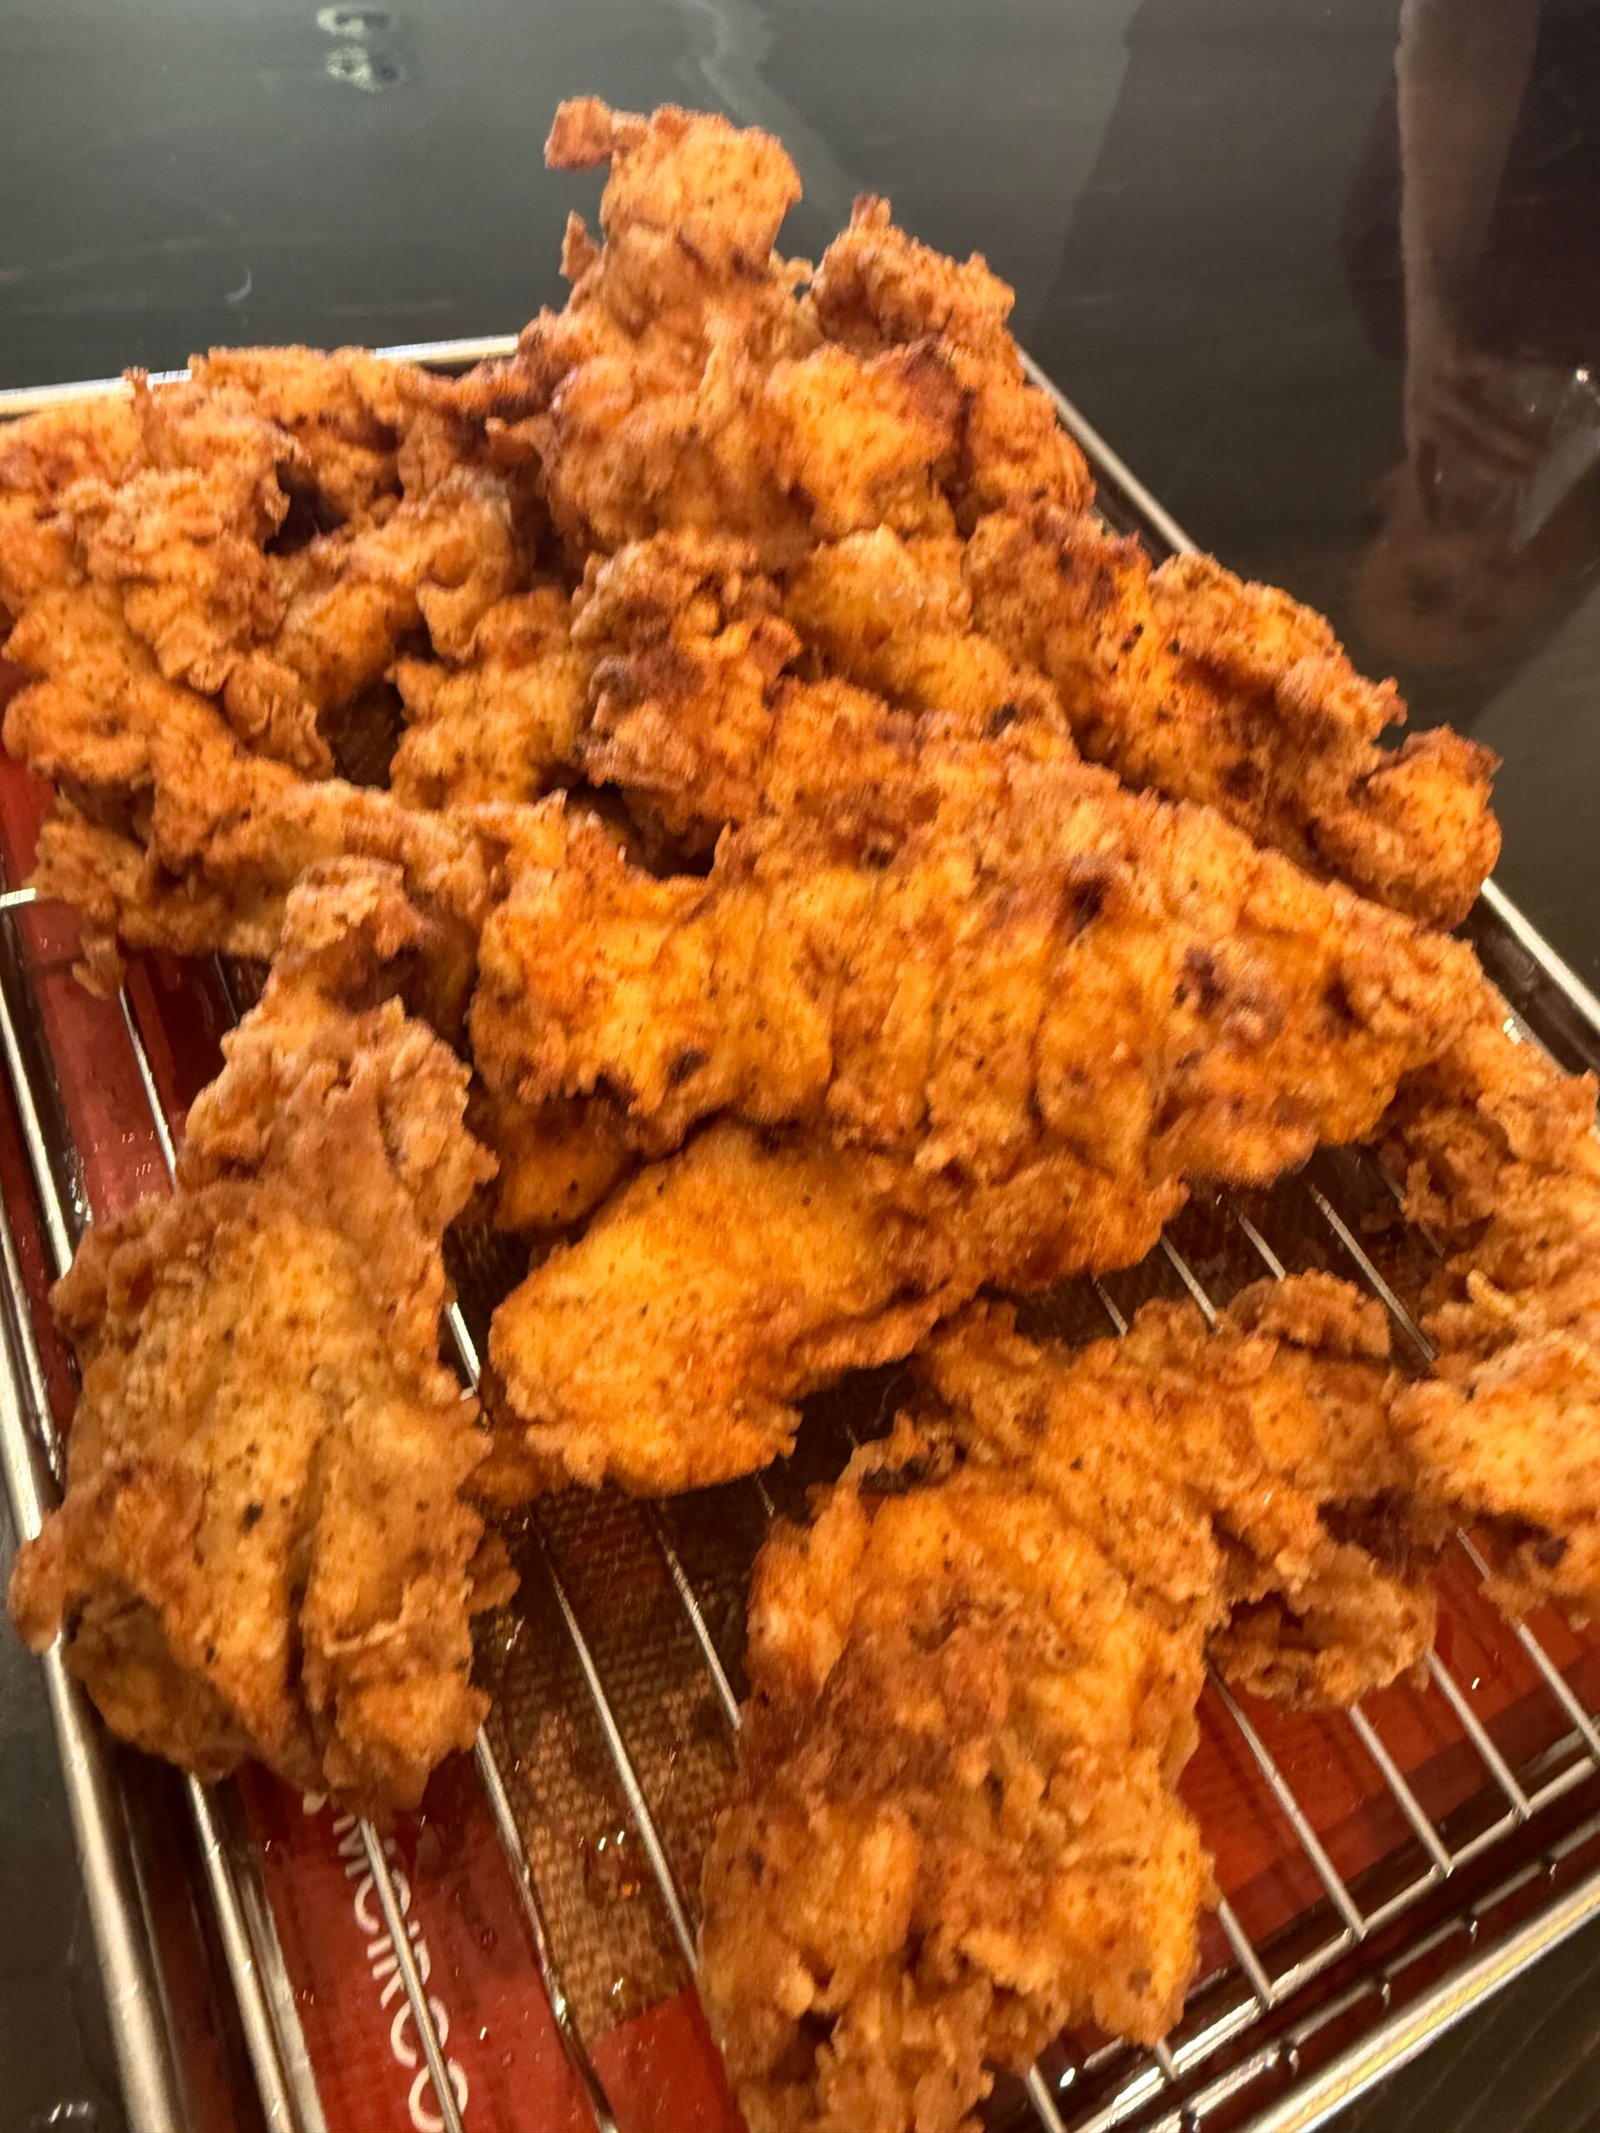
          Crispy golden-brown buttermilk fried chicken breasts with a craggy seasoned crust
          Cole

          Cole’s Fried Chicken

          Crispy, golden-brown buttermilk fried chicken breasts with a craggy seasoned crust.
          Servings: 4

          Ingredients
            

          Buttermilk Marinade
          • 4 chicken breasts
          • 2 cups buttermilk
          • 2 teaspoons kosher salt
          • 2 teaspoons garlic powder
          • 1 teaspoon hot chili powder such as serrano or cayenne
          Flour-Based Wet Batter
          • 1 cup all-purpose flour
          • 1 cup buttermilk fresh or ladled from the marinade
          • 1 large egg
          • 1 teaspoon kosher salt
          • 1 teaspoon garlic powder
          • 1/2 teaspoon smoked paprika
          • 1/4 teaspoon black pepper
          Final Dredge
          • 2 cups all-purpose flour
          • 1/2 cup cornstarch
          • 2 1/2 teaspoons kosher salt
          • 1 1/2 teaspoons smoked paprika
          • 2 teaspoons garlic powder
          • 1 teaspoon oyster mushroom powder optional
          • 1/2 teaspoon freshly ground black pepper
          • 1 teaspoon cayenne pepper optional
          • 1 1/2 to 2 teaspoons baking powder
          • 2 to 3 tablespoons buttermilk from the marinade or fresh

          Method
           

          Buttermilk Marinade
          1. Whisk together the buttermilk, kosher salt, garlic powder, and hot chili powder in a large bowl.
          2. Add the chicken breasts and coat completely.
          3. Cover and refrigerate for at least 1 hour. Overnight is best for deeper flavor.
          Make the Wet Batter
          1. Whisk together the flour, kosher salt, garlic powder, smoked paprika, and black pepper in a medium bowl.
          2. In a separate bowl, whisk the egg and buttermilk until smooth.
          3. Pour the egg-and-buttermilk mixture into the dry ingredients.
          4. Whisk until smooth and pancake-like. The batter should cling to the chicken but still drip slowly.
          5. If the batter is too thick, add a splash of buttermilk or water.
          6. If it is too thin, whisk in a little more flour.
          Prepare the Final Dredge
          1. Whisk together the flour, cornstarch, kosher salt, smoked paprika, garlic powder, optional oyster mushroom powder, black pepper, optional cayenne, and baking powder in a large shallow bowl.
          2. Just before coating the chicken, drizzle 2 to 3 tablespoons of buttermilk into the dredge.
          3. Toss with your fingers to form small flour clumps for a craggier crust.
          Coat and Fry the Chicken
          1. Remove chicken from the marinade and pat lightly with paper towels. The chicken should still be moist but not dripping.
          2. Butterfly and flatten thick chicken breasts, or gently pound them to an even thickness.
          3. Dip each chicken breast fully into the wet batter.
          4. Let the excess batter drip away for a couple of seconds.
          5. Transfer the chicken to the final dredge.
          6. Toss and press the flour mixture firmly onto all sides, making sure the flour clumps stick.
          7. Shake away only loose excess flour.
          8. Transfer coated chicken to a wire rack.
          9. Rest the chicken for 10 to 20 minutes so the coating can hydrate and set.
          10. Heat neutral oil to 340 to 350°F.
          11. Fry 1 to 2 pieces at a time without crowding the pan.
          12. Fry until deep golden brown and the thickest part reaches 165°F, about 6 to 10 minutes depending on thickness and oil temperature.
          13. Drain on a clean wire rack rather than paper towels.
          14. Rest fried chicken for 5 to 10 minutes before slicing or serving.
          Notes
          1. For extra heat, use the optional cayenne in the final dredge and a hotter chili powder in the marinade.
          2. Do not skip the wire-rack rest before frying or after frying; it helps preserve the crunchy coating.
          3. Oyster mushroom powder adds savory depth but is optional.
          4. Serve as a fried chicken dinner or use the breasts for sandwiches with toasted buns, pickles, slaw, mayonnaise, or hot sauce.